Note: If you haven’t created your enterprise account yet, head to Getting Started first.
Configuring SAML Authentication
Inviting Technical Team Members
Invite IT or Security team members to help with SAML setup. Until SAML is fully configured, technical members can only access the dashboard via a magic invitation link.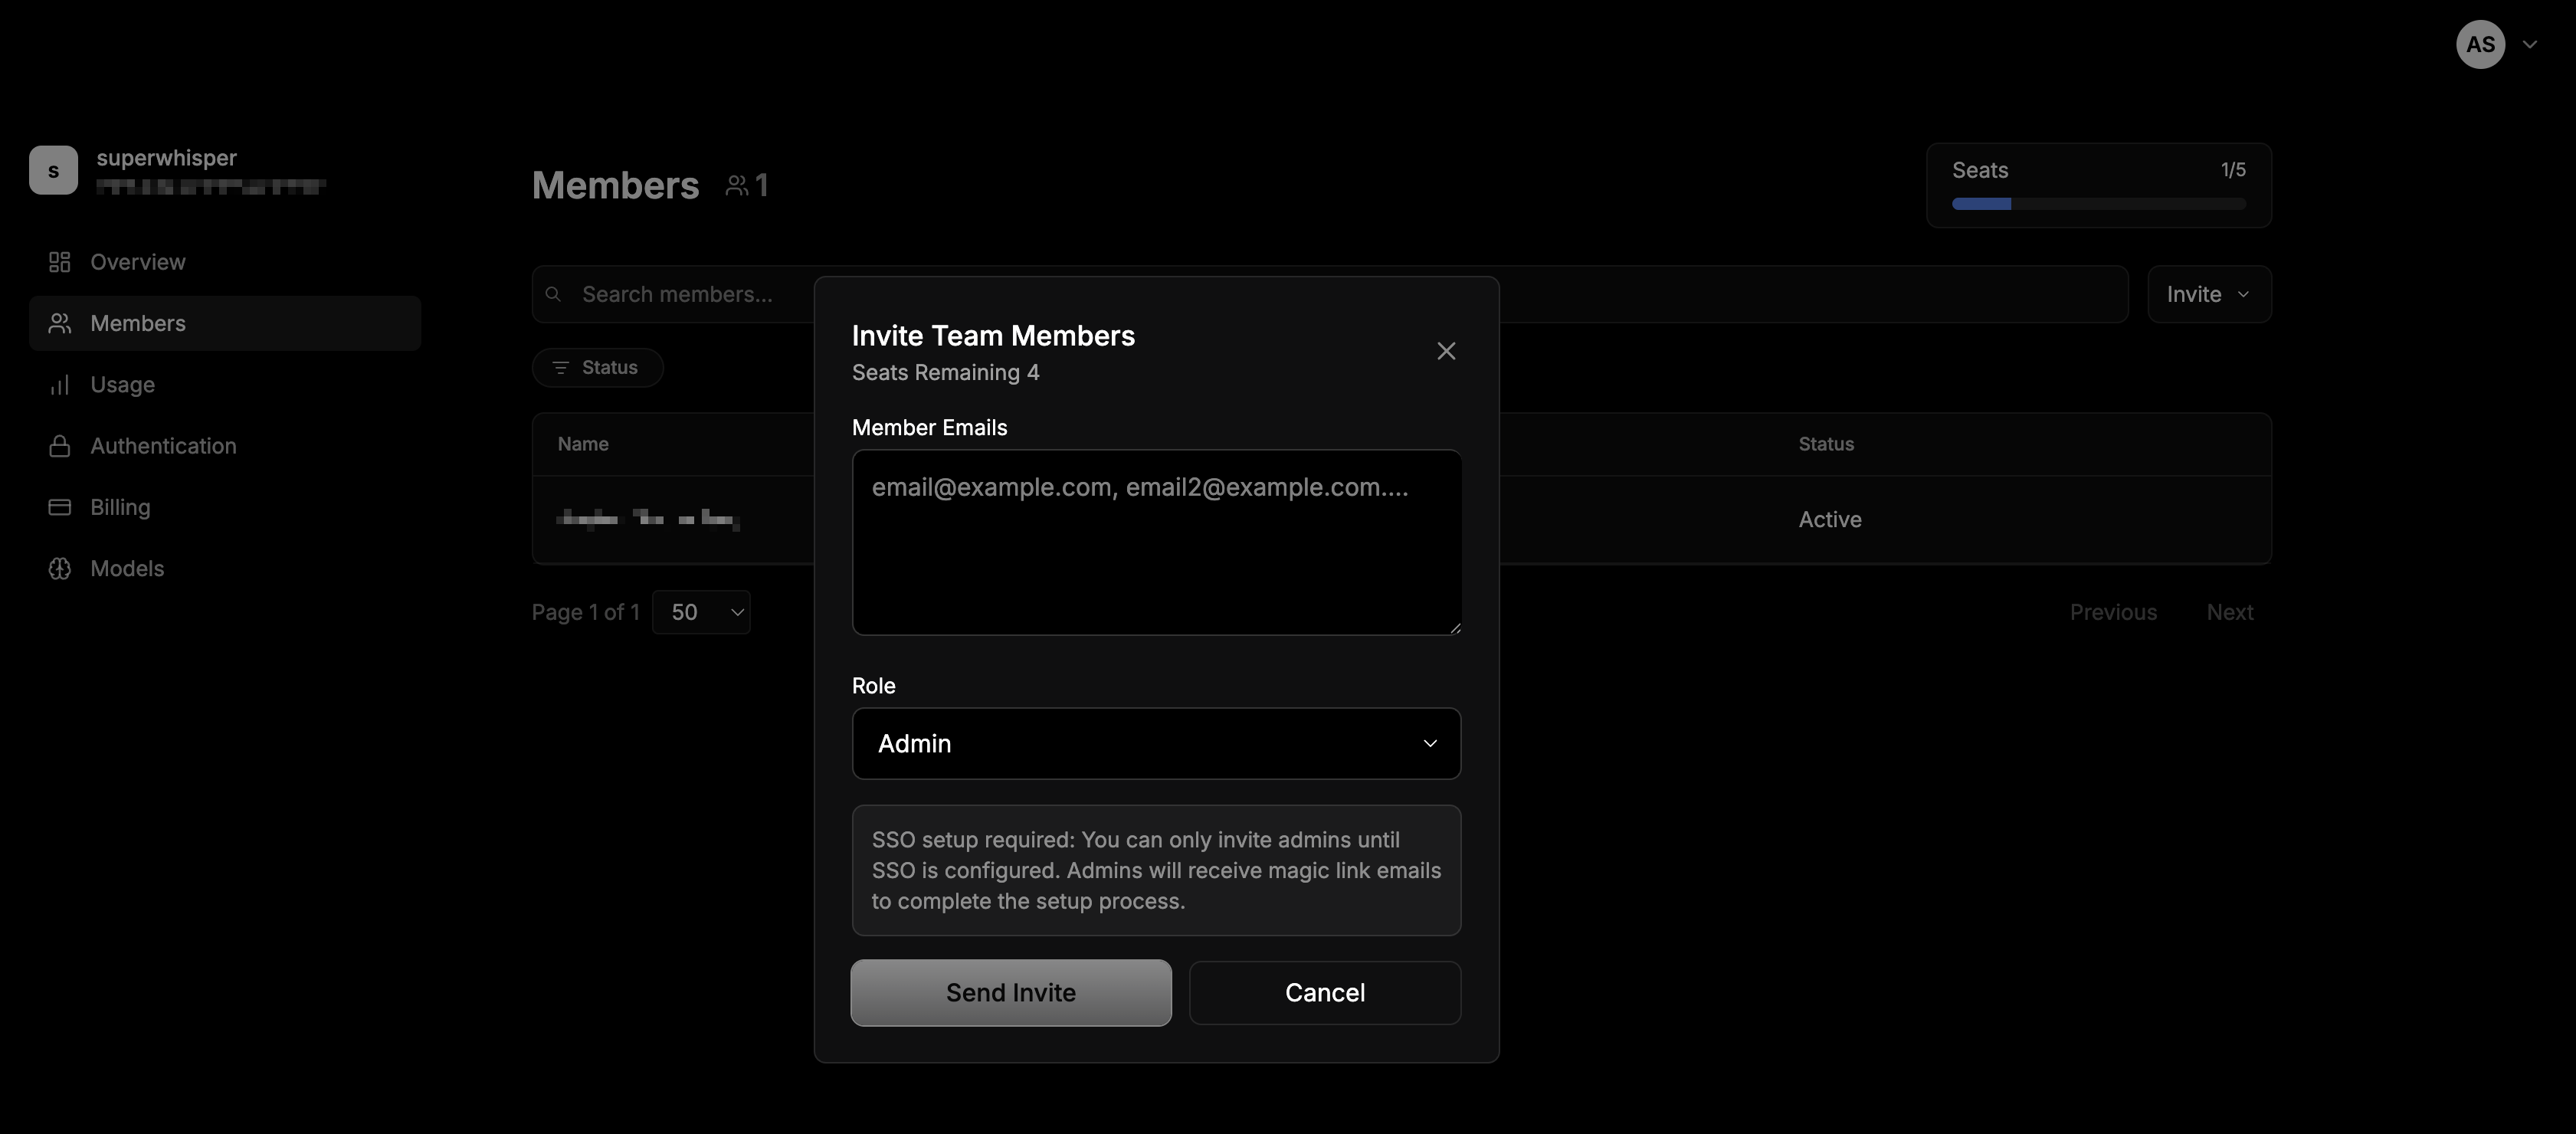
- Go to the Members tab in your dashboard
- Invite via email as admin (see Member Management for detailed instructions)
- Access the Authentication page for SAML configuration
- View organization settings and your unique Assertion Consumer Service URL
- Help with technical setup and troubleshooting
Setting Up SAML
Navigate to the Authentication page on your dashboard to find everything you need for SAML setup, including your organization’s unique Assertion Consumer Service URL.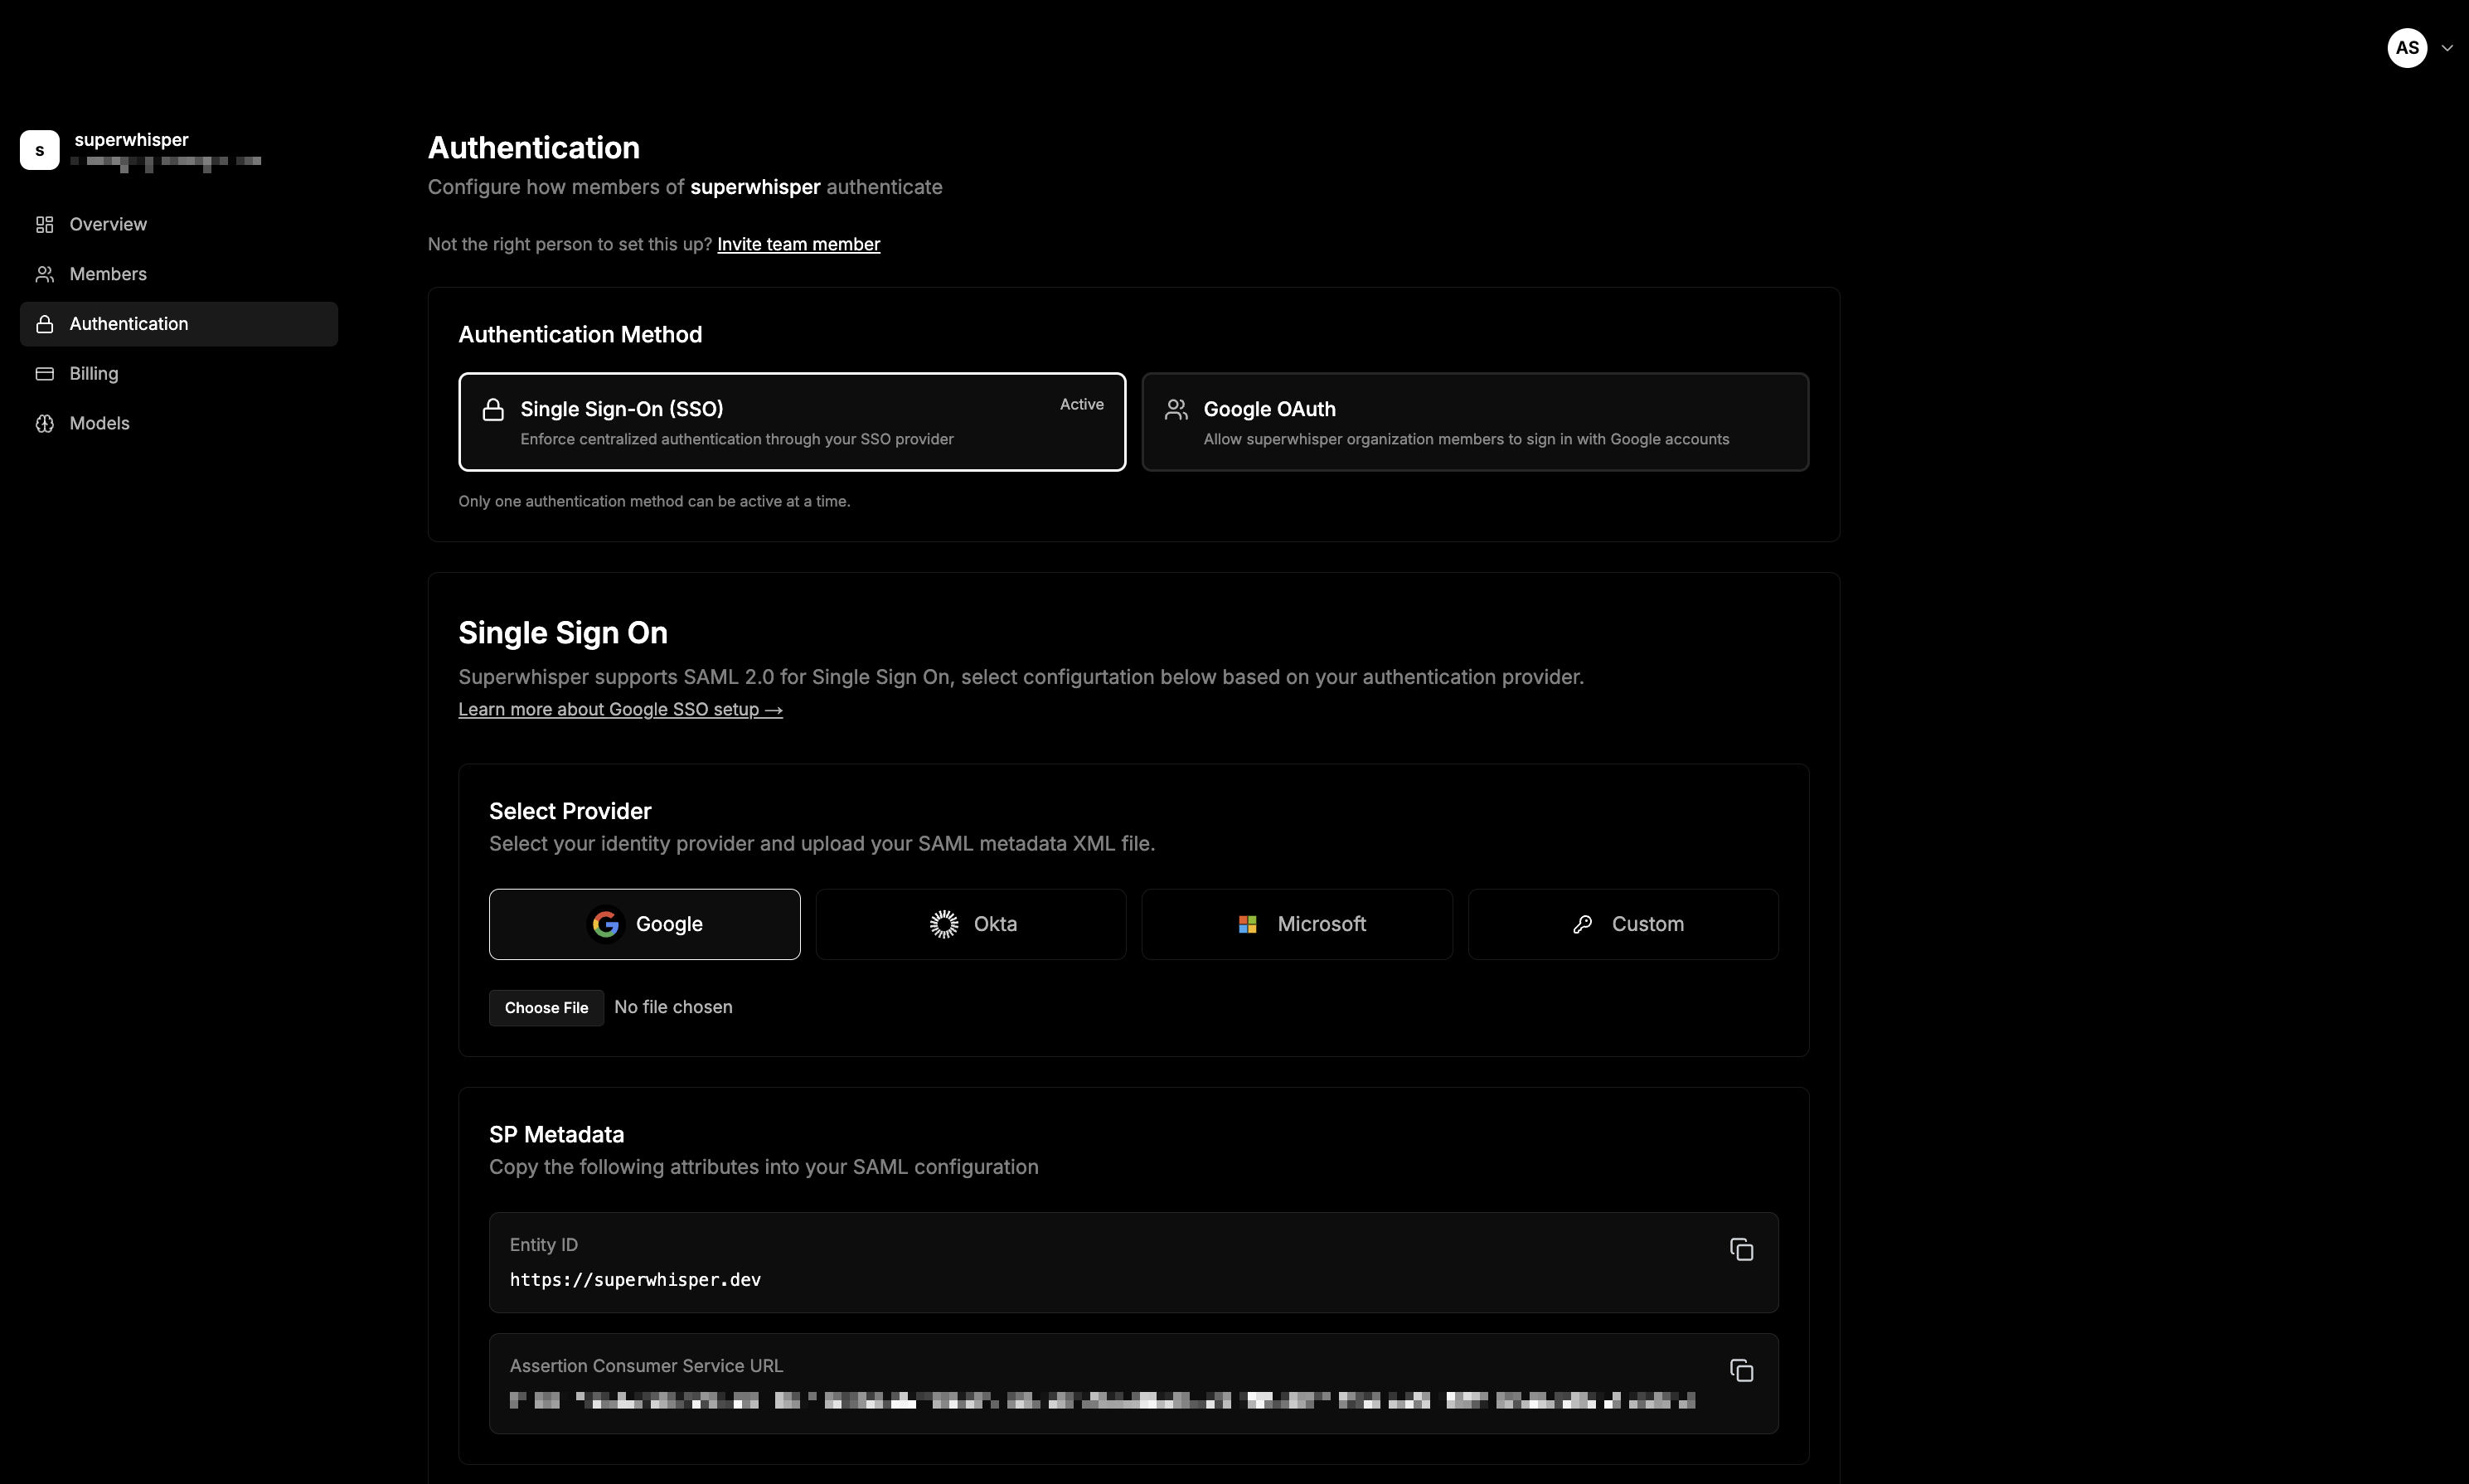
Authentication Methods
Superwhisper offers three authentication methods:- Single Sign-On (SSO) - Use SAML 2.0 for enterprise SSO integration
- Google OAuth - Allow organization members to sign in with Google accounts
- Magic Link - Members sign in via a one-time email link. No SSO required
Setting Up Single Sign-On
Superwhisper supports SAML 2.0 for Single Sign-On. Follow these steps to configure your authentication provider:1. Select Your Identity Provider
Choose from the supported identity providers:- Google - For Google Workspace organizations
- Okta - For Okta identity management
- Microsoft - For Azure AD/Microsoft Entra ID
- Custom - For other SAML 2.0 compatible providers
2. Configure SP Metadata
Copy the following attributes into your SAML configuration: Entity ID:Note: Your Assertion Consumer Service URL is unique to your organization. Copy it from the authentication screen.
3. Upload SAML Metadata
Select your identity provider and upload your SAML metadata XML file provided by your authentication provider.4. Test Your Configuration
Use the Test button in the Single Sign-On section to verify your SAML configuration. Depending on the identity provider, records can take a couple of minutes to propagate on their end.Next Steps
- SCIM Provisioning to automate user provisioning and deprovisioning
- MDM & Silent Deployment to roll the app out across your fleet with auto-activation through SSO