Overview
Superwhisper’s AI-powered dictation makes the process simple, but you might need to explore your recordings in detail. The History is packed with features that allow you to filter through past dictations, reprocess recordings with different modes, and access detailed information about both voice and AI processing.Accessing the History
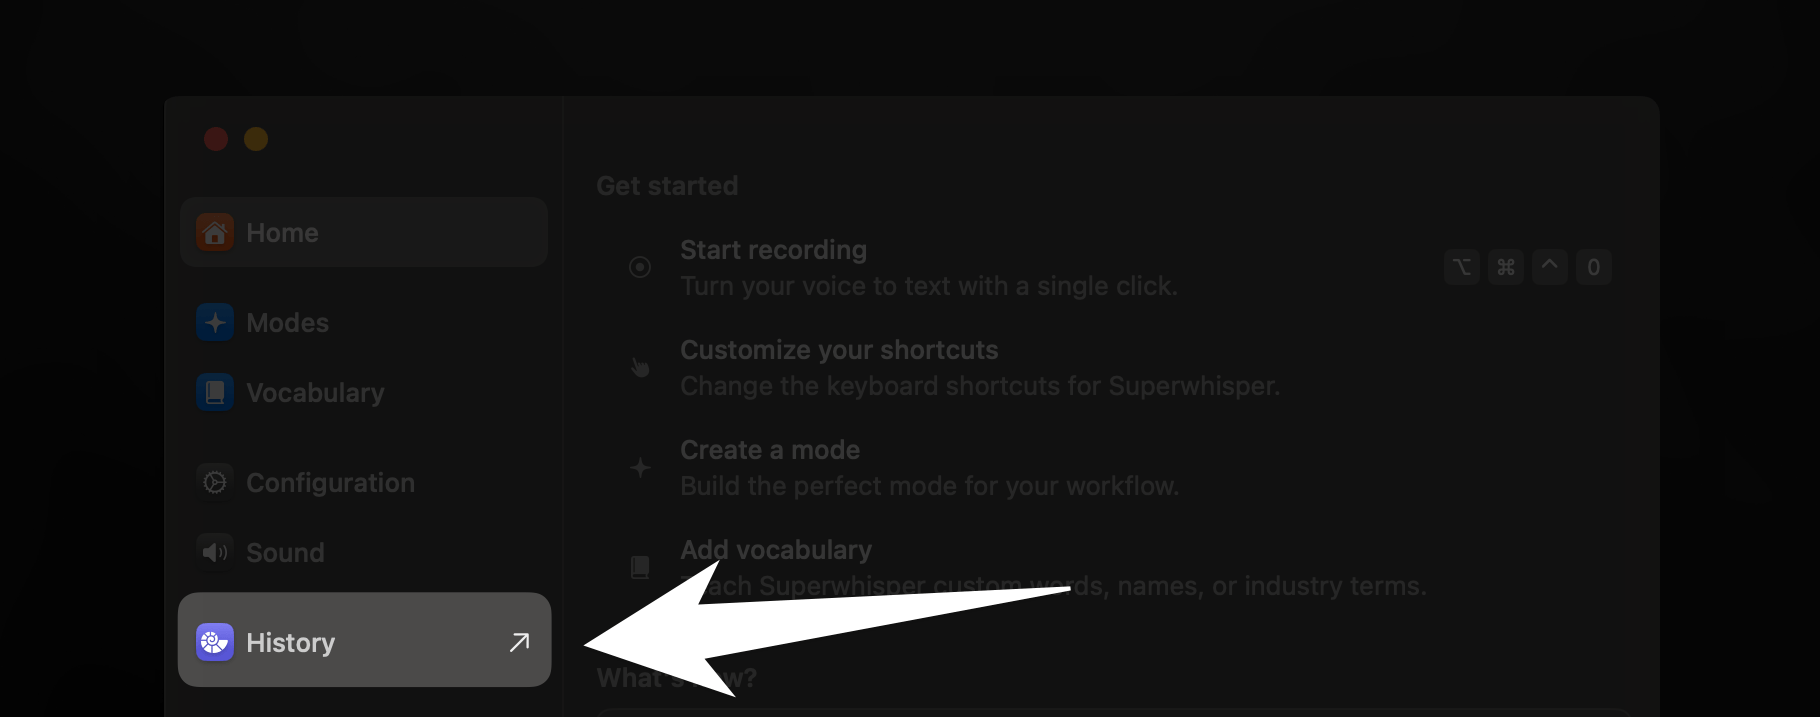
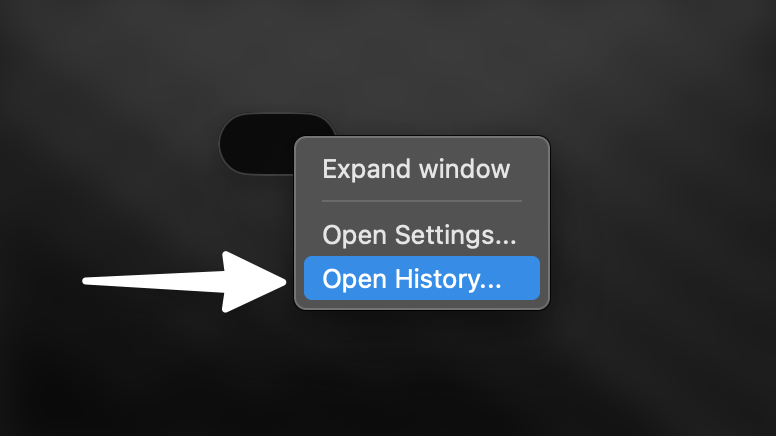
You can access Superwhisper’s history through:1. The Settings Window
1. The Settings Window

Key Features
Search Recordings
Use the search field on the left sidebar to quickly find specific recordings based on your original voice input.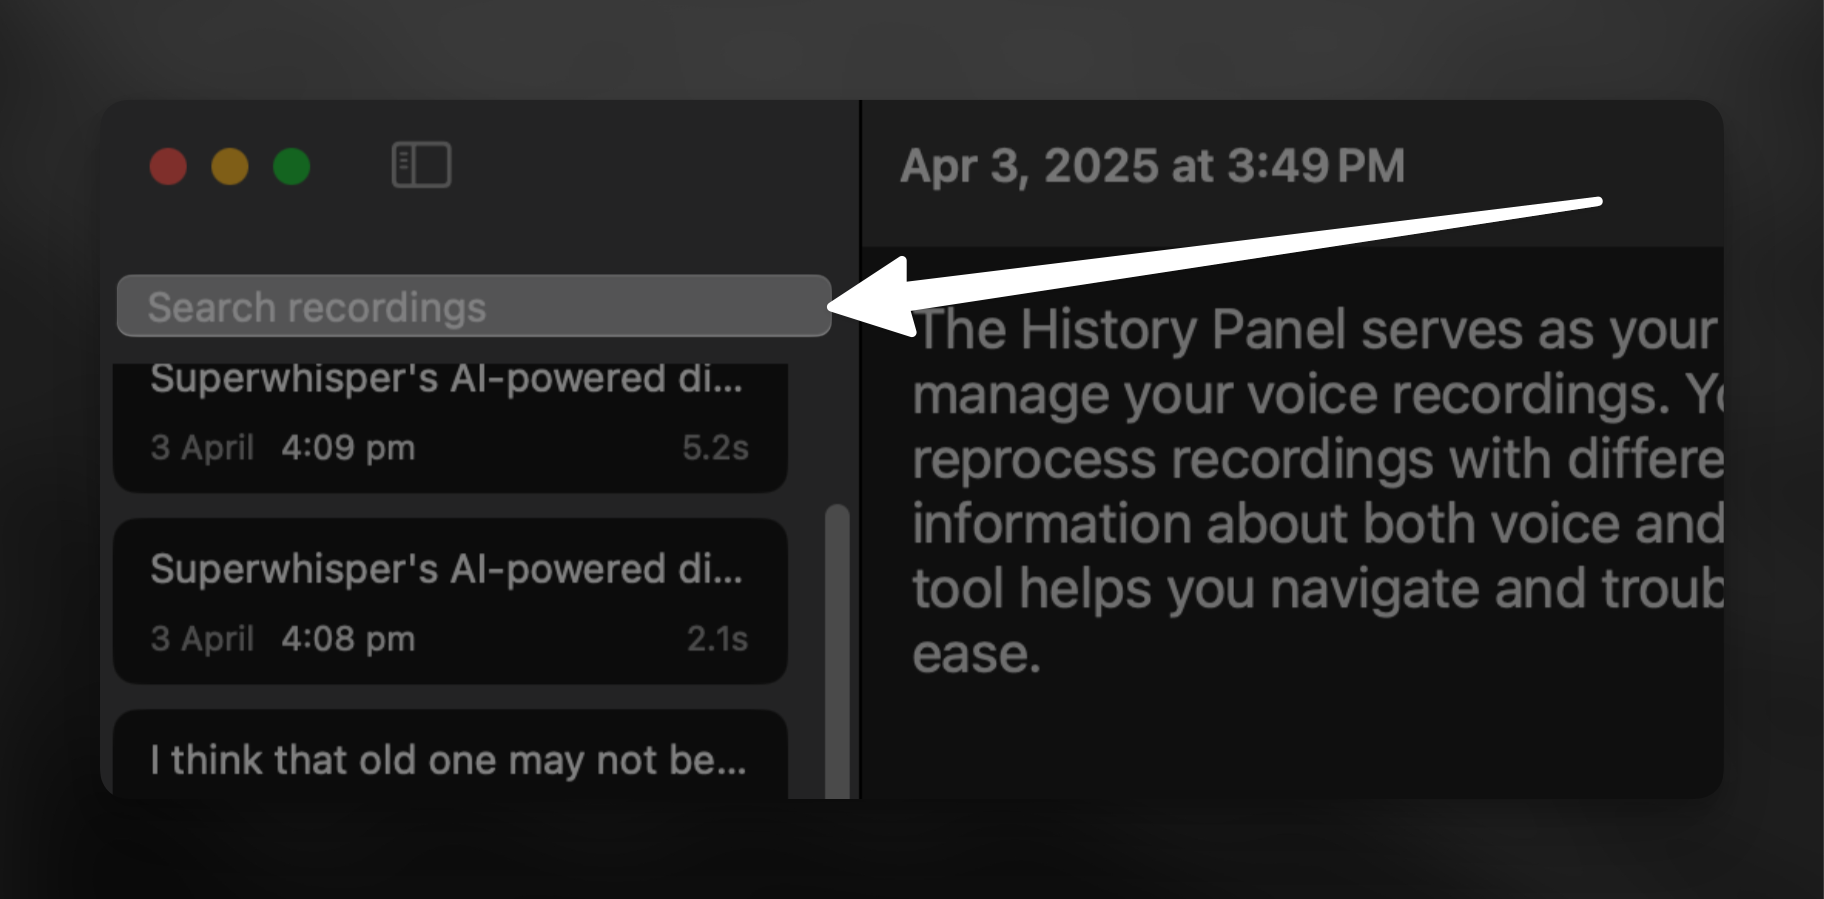
Keep in mind: Search only filters original dictation, not AI-processed results
Reprocess Recordings
Sometimes your dictation results may not meet your expectations. Various factors can affect the outcome - from voice models to AI processing or system-related issues. You can reprocess any dictation when needed. Just remember that Superwhisper will use your currently active mode for the new processing. To reprocess a dictation, right-click it in the left sidebar and select “Process Again.”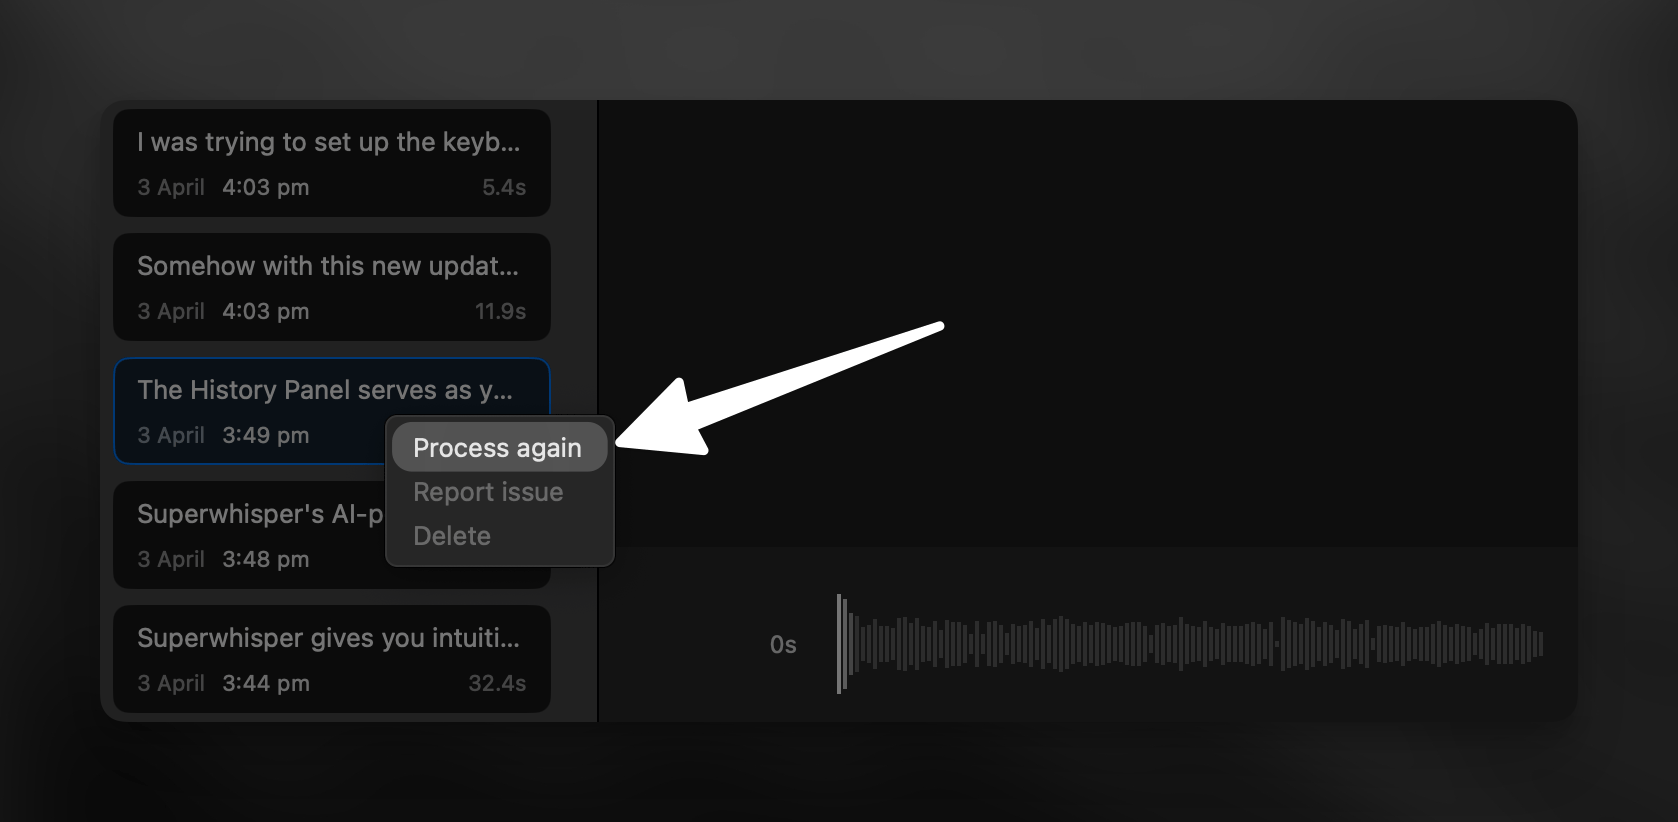
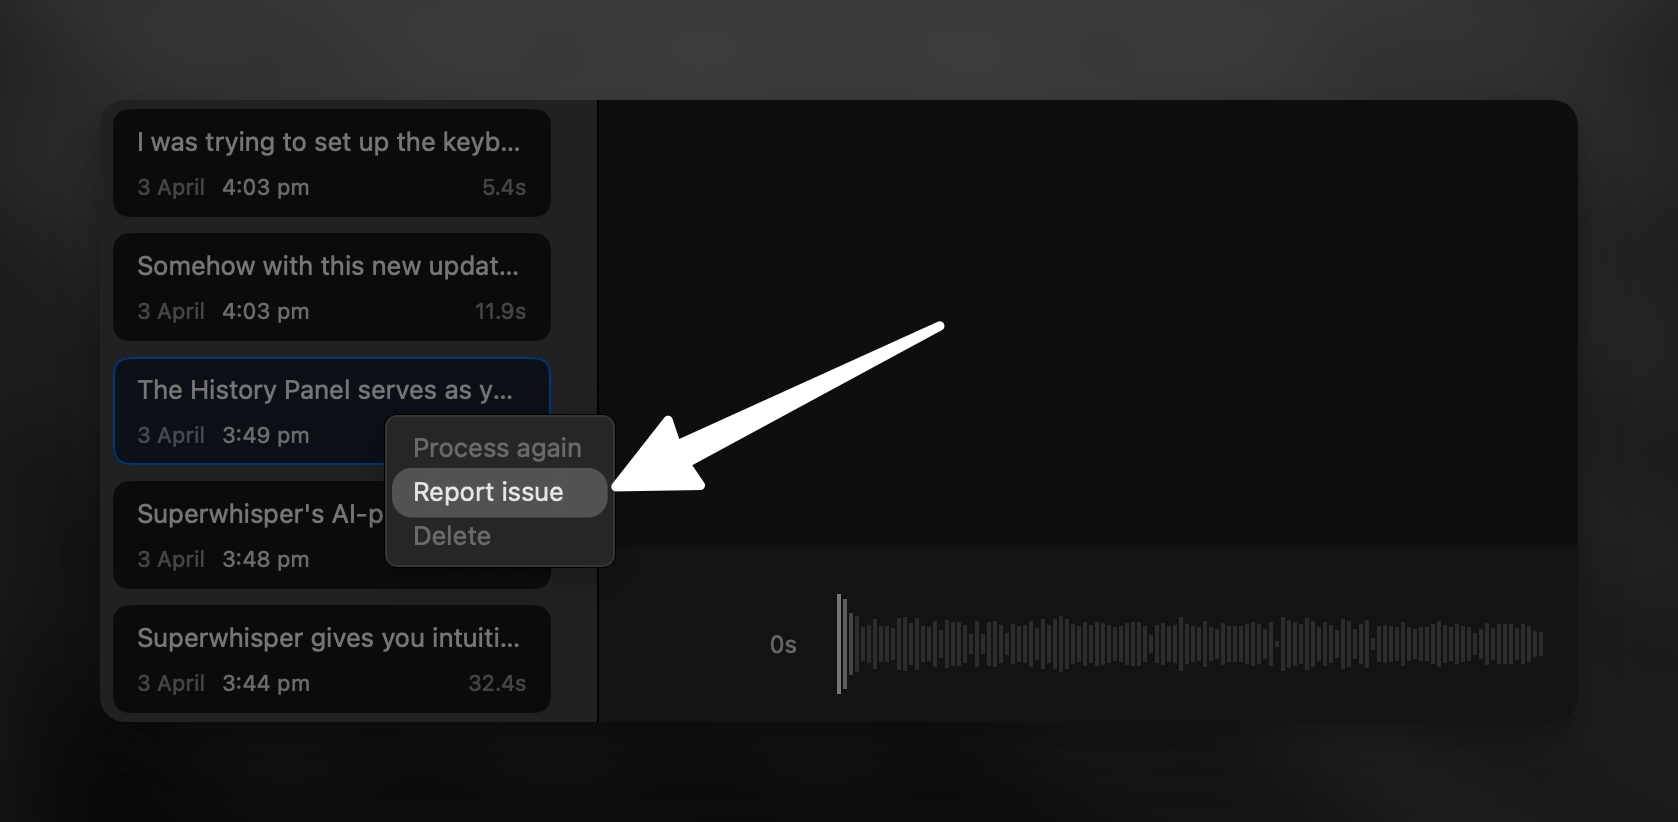
Report Errors
If your dictations don’t produce the expected results or you are experiencing technical problems, you can report these issues directly through the History Panel. Here’s how:- Find the affected dictation in your history
- Right-click on the dictation
- Select “Report Issue” from the menu
For more ways to report errors in Superwhisper, refer to this detailed guide.
Manage Recordings
Superwhisper’s History offers two methods for deleting previous recordings:1
The Sidebar
- Select one single recording or multiple recordings by holding Shift
- Right-click on the selected recording(s)
- Choose “Delete” from the context menu

2
Reveal in Finder
Select any dictation and click the folder icon to open Superwhisper’s folder. This shows you all your past dictations, which you can delete directly in Finder.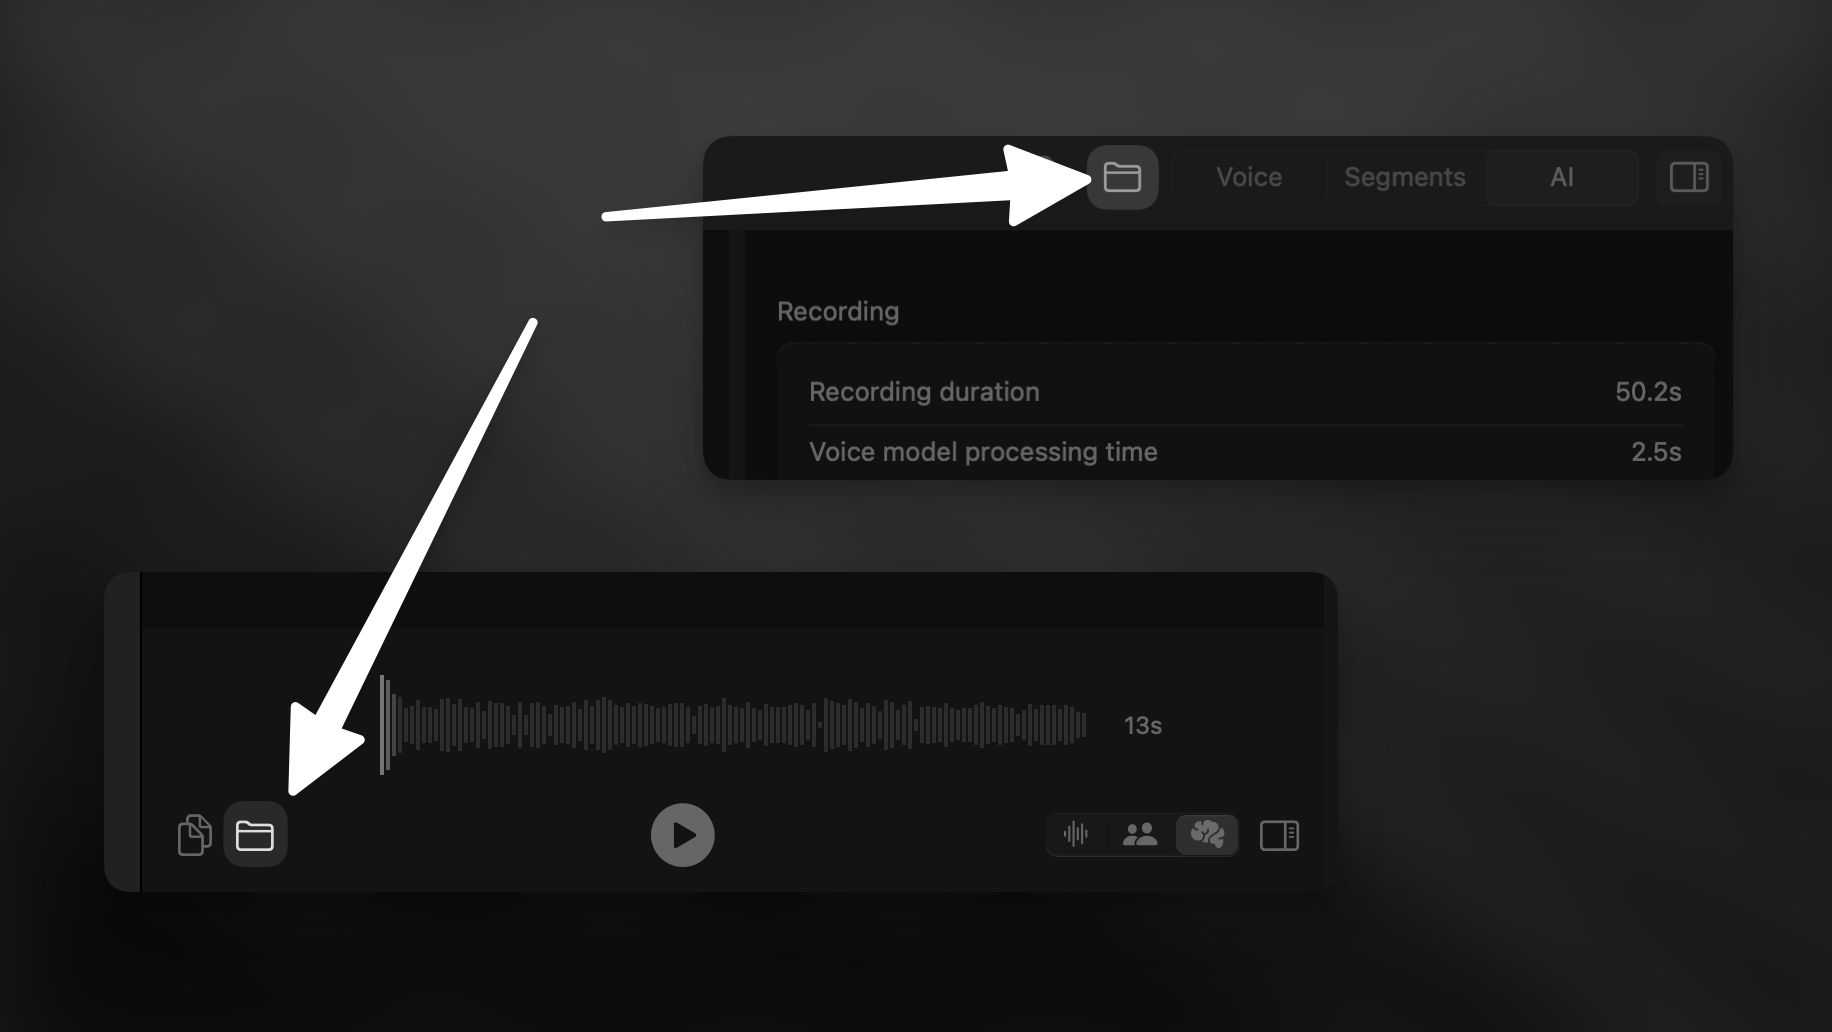
Superwhisper does not automatically delete past recordings. It’s recommended to periodically clean up your history manually to manage storage space.
Analyze Results
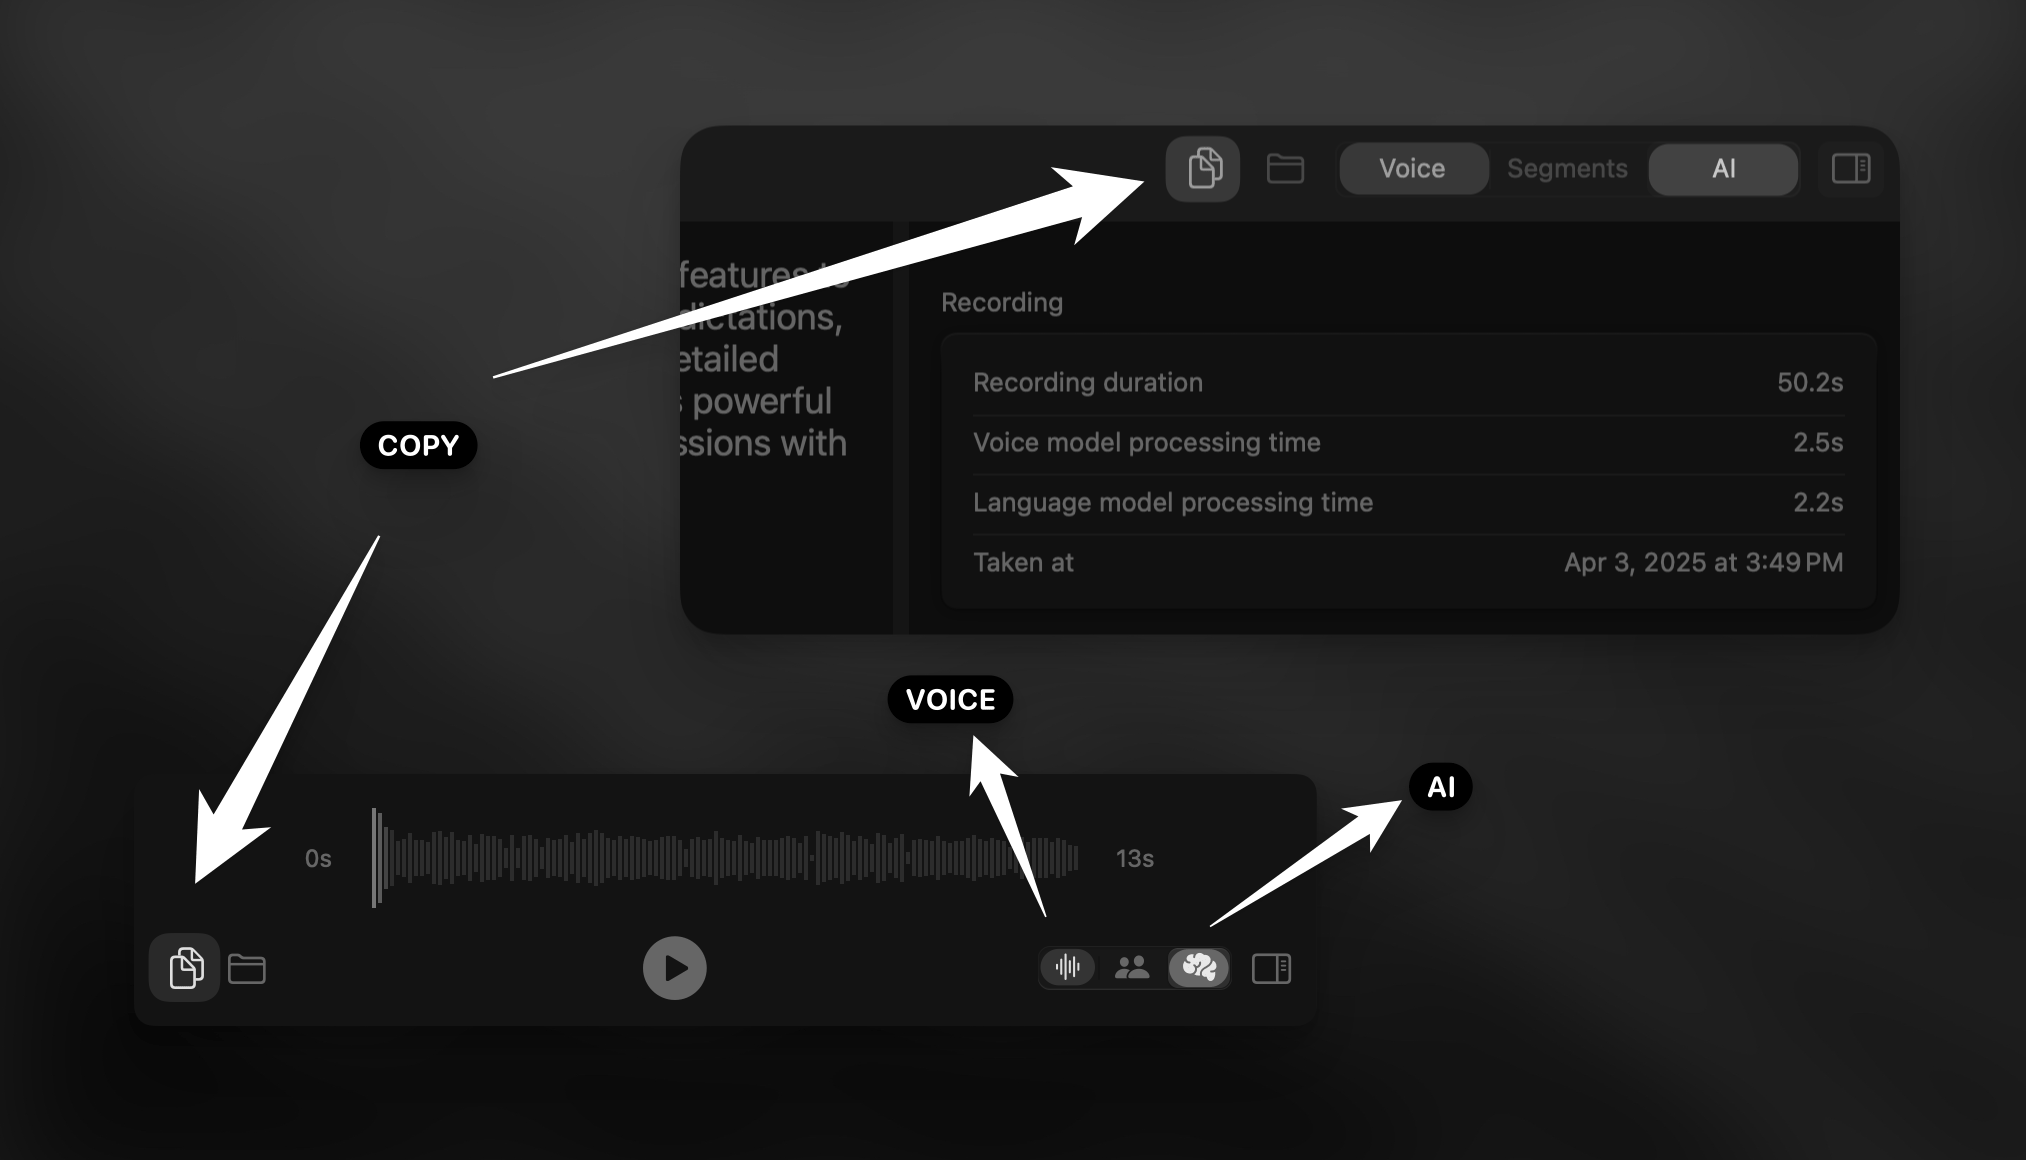
Superwhisper’s History can display your voice transcription and AI-processed text. Two sets of controls let you switch between these views: one in the top-right side of the window and another below the waveform display. Each set includes buttons to toggle between “Voice” (the original transcription) and “AI” (the processed result), plus a “Copy” button that copies the currently displayed text.Note that AI processing depends on your selected mode, so some recordings may only have voice transcription available.
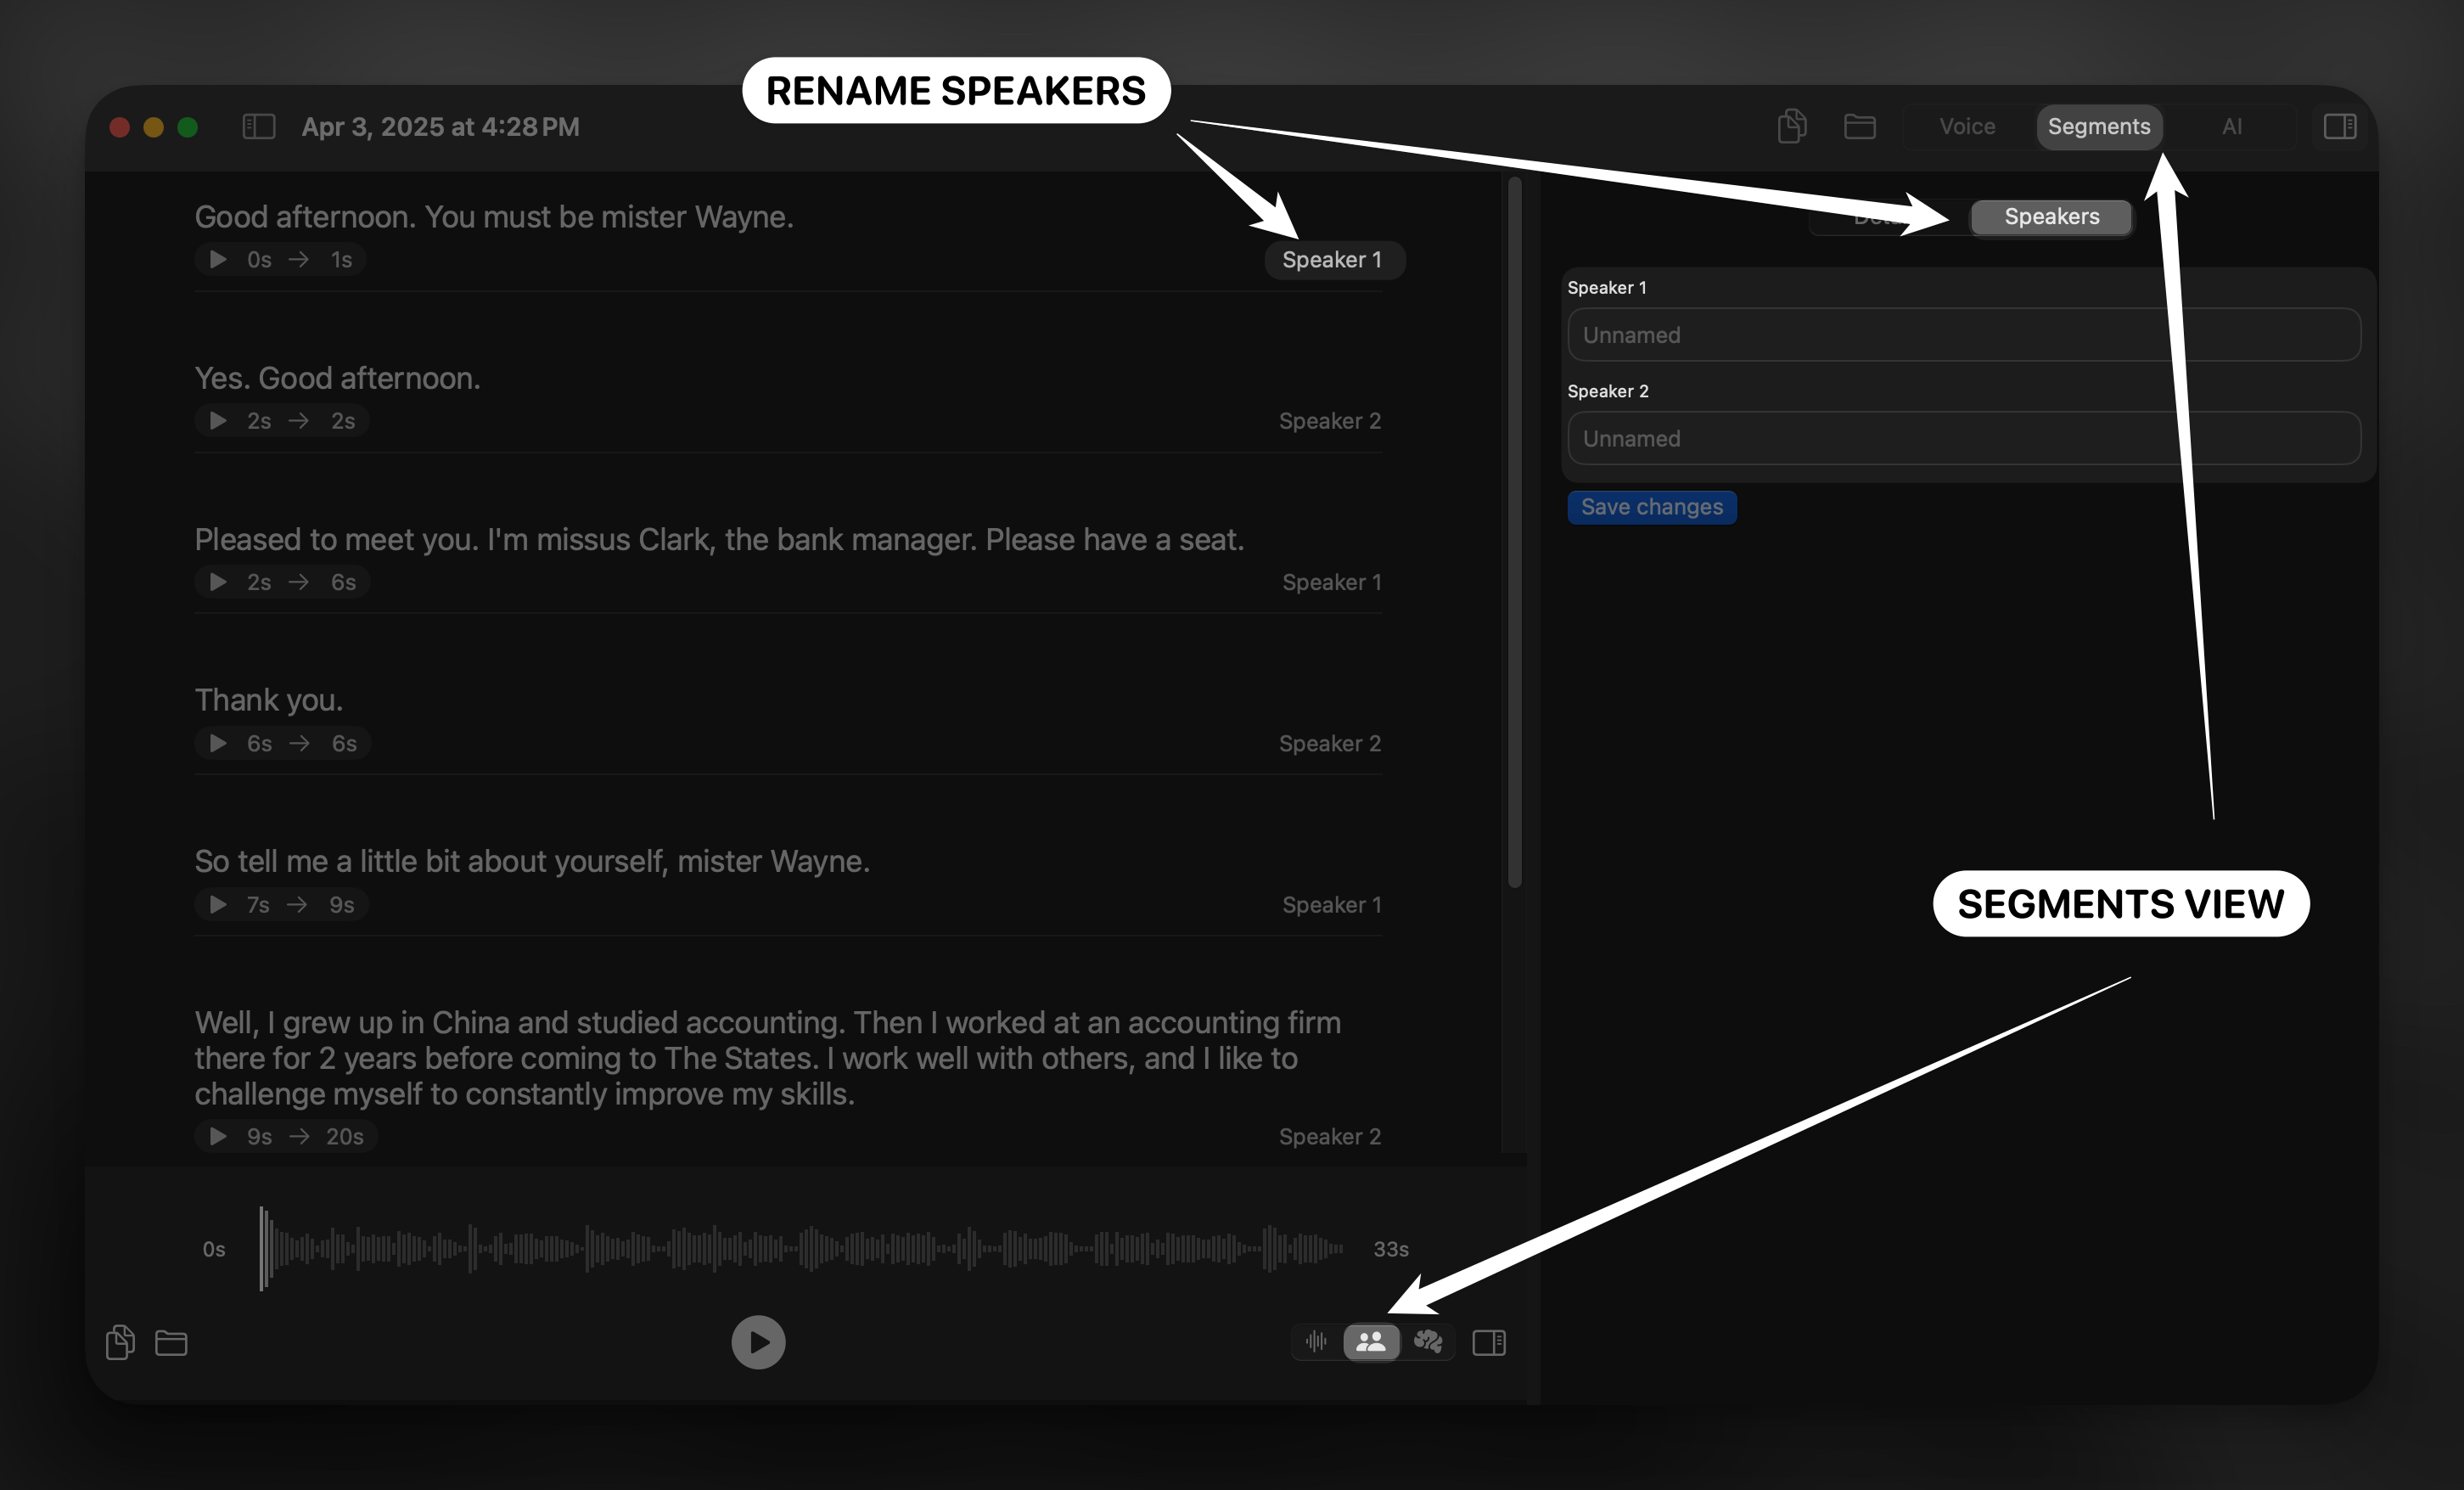
Speaker Separation
In Superwhisper’s History, you can access speaker-separated transcriptions through the Segments view. This view appears alongside the buttons that toggle between voice and AI results.Currently, Nova Cloud provides the most accurate speaker differentiation among Superwhisper’s voice models. For detailed information on how to process speaker-separated transcriptions with AI, refer to this guide.
- Click the speaker name directly in the transcription
- Select speakers from the right sidebar
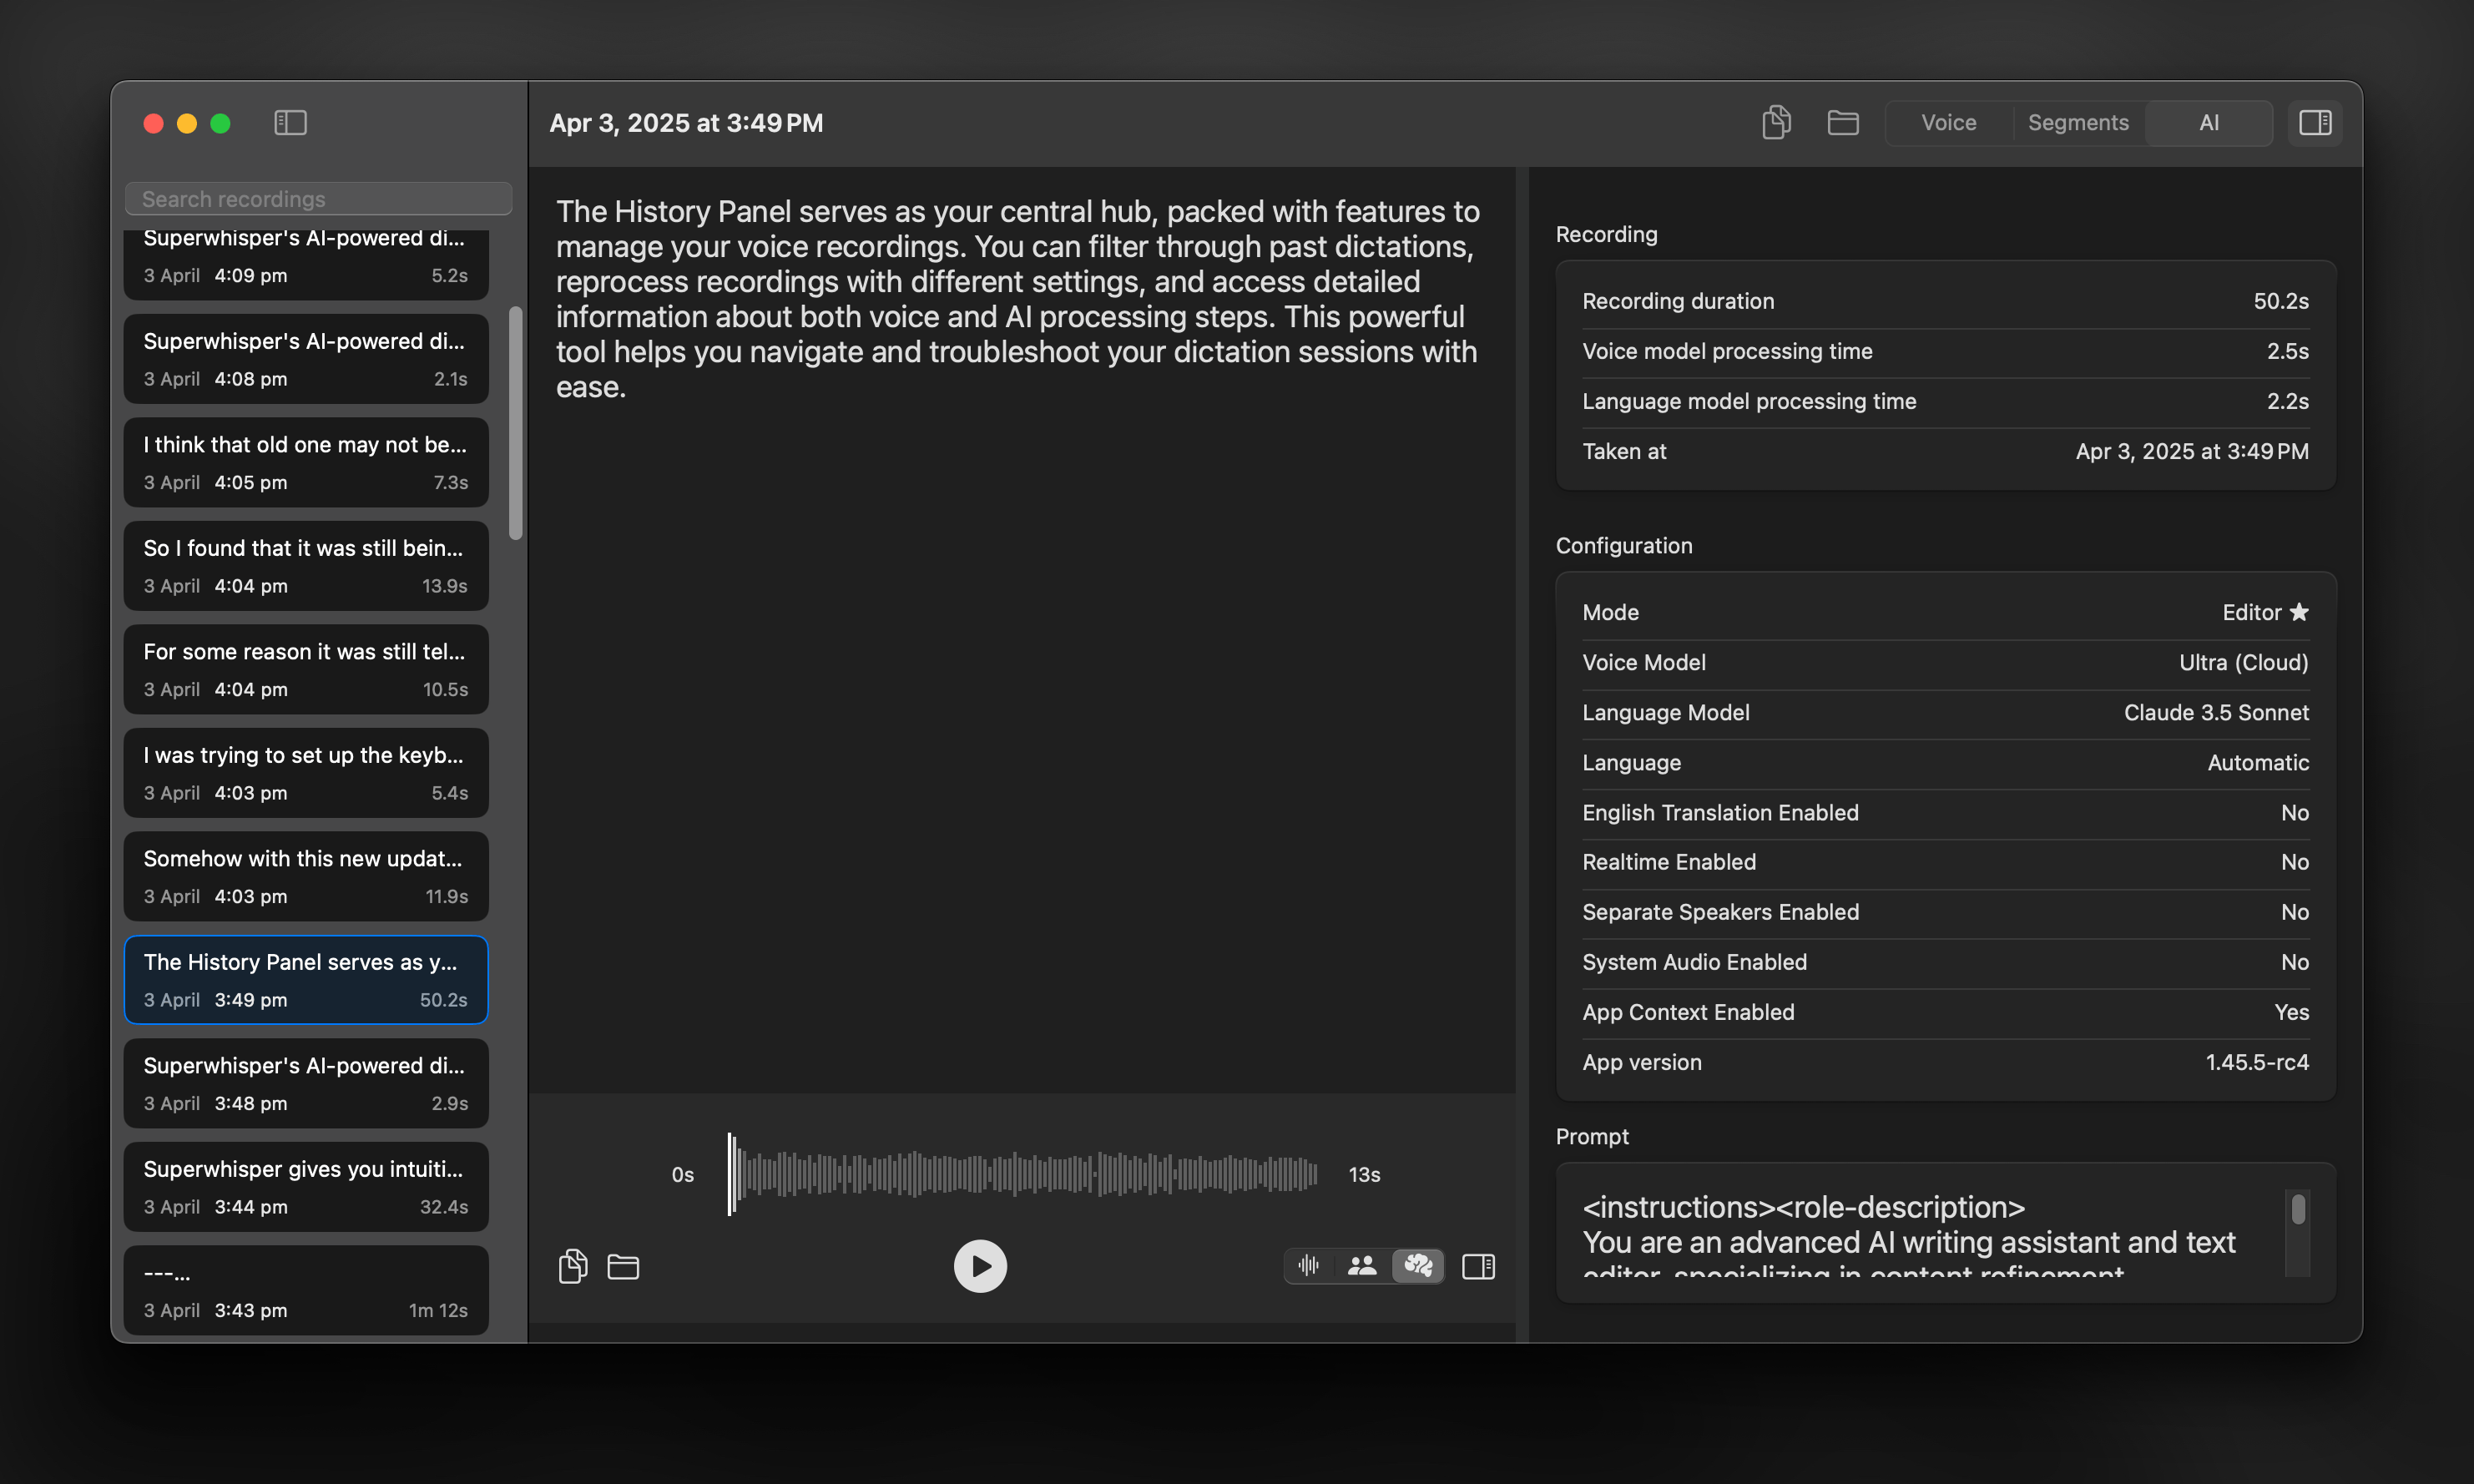
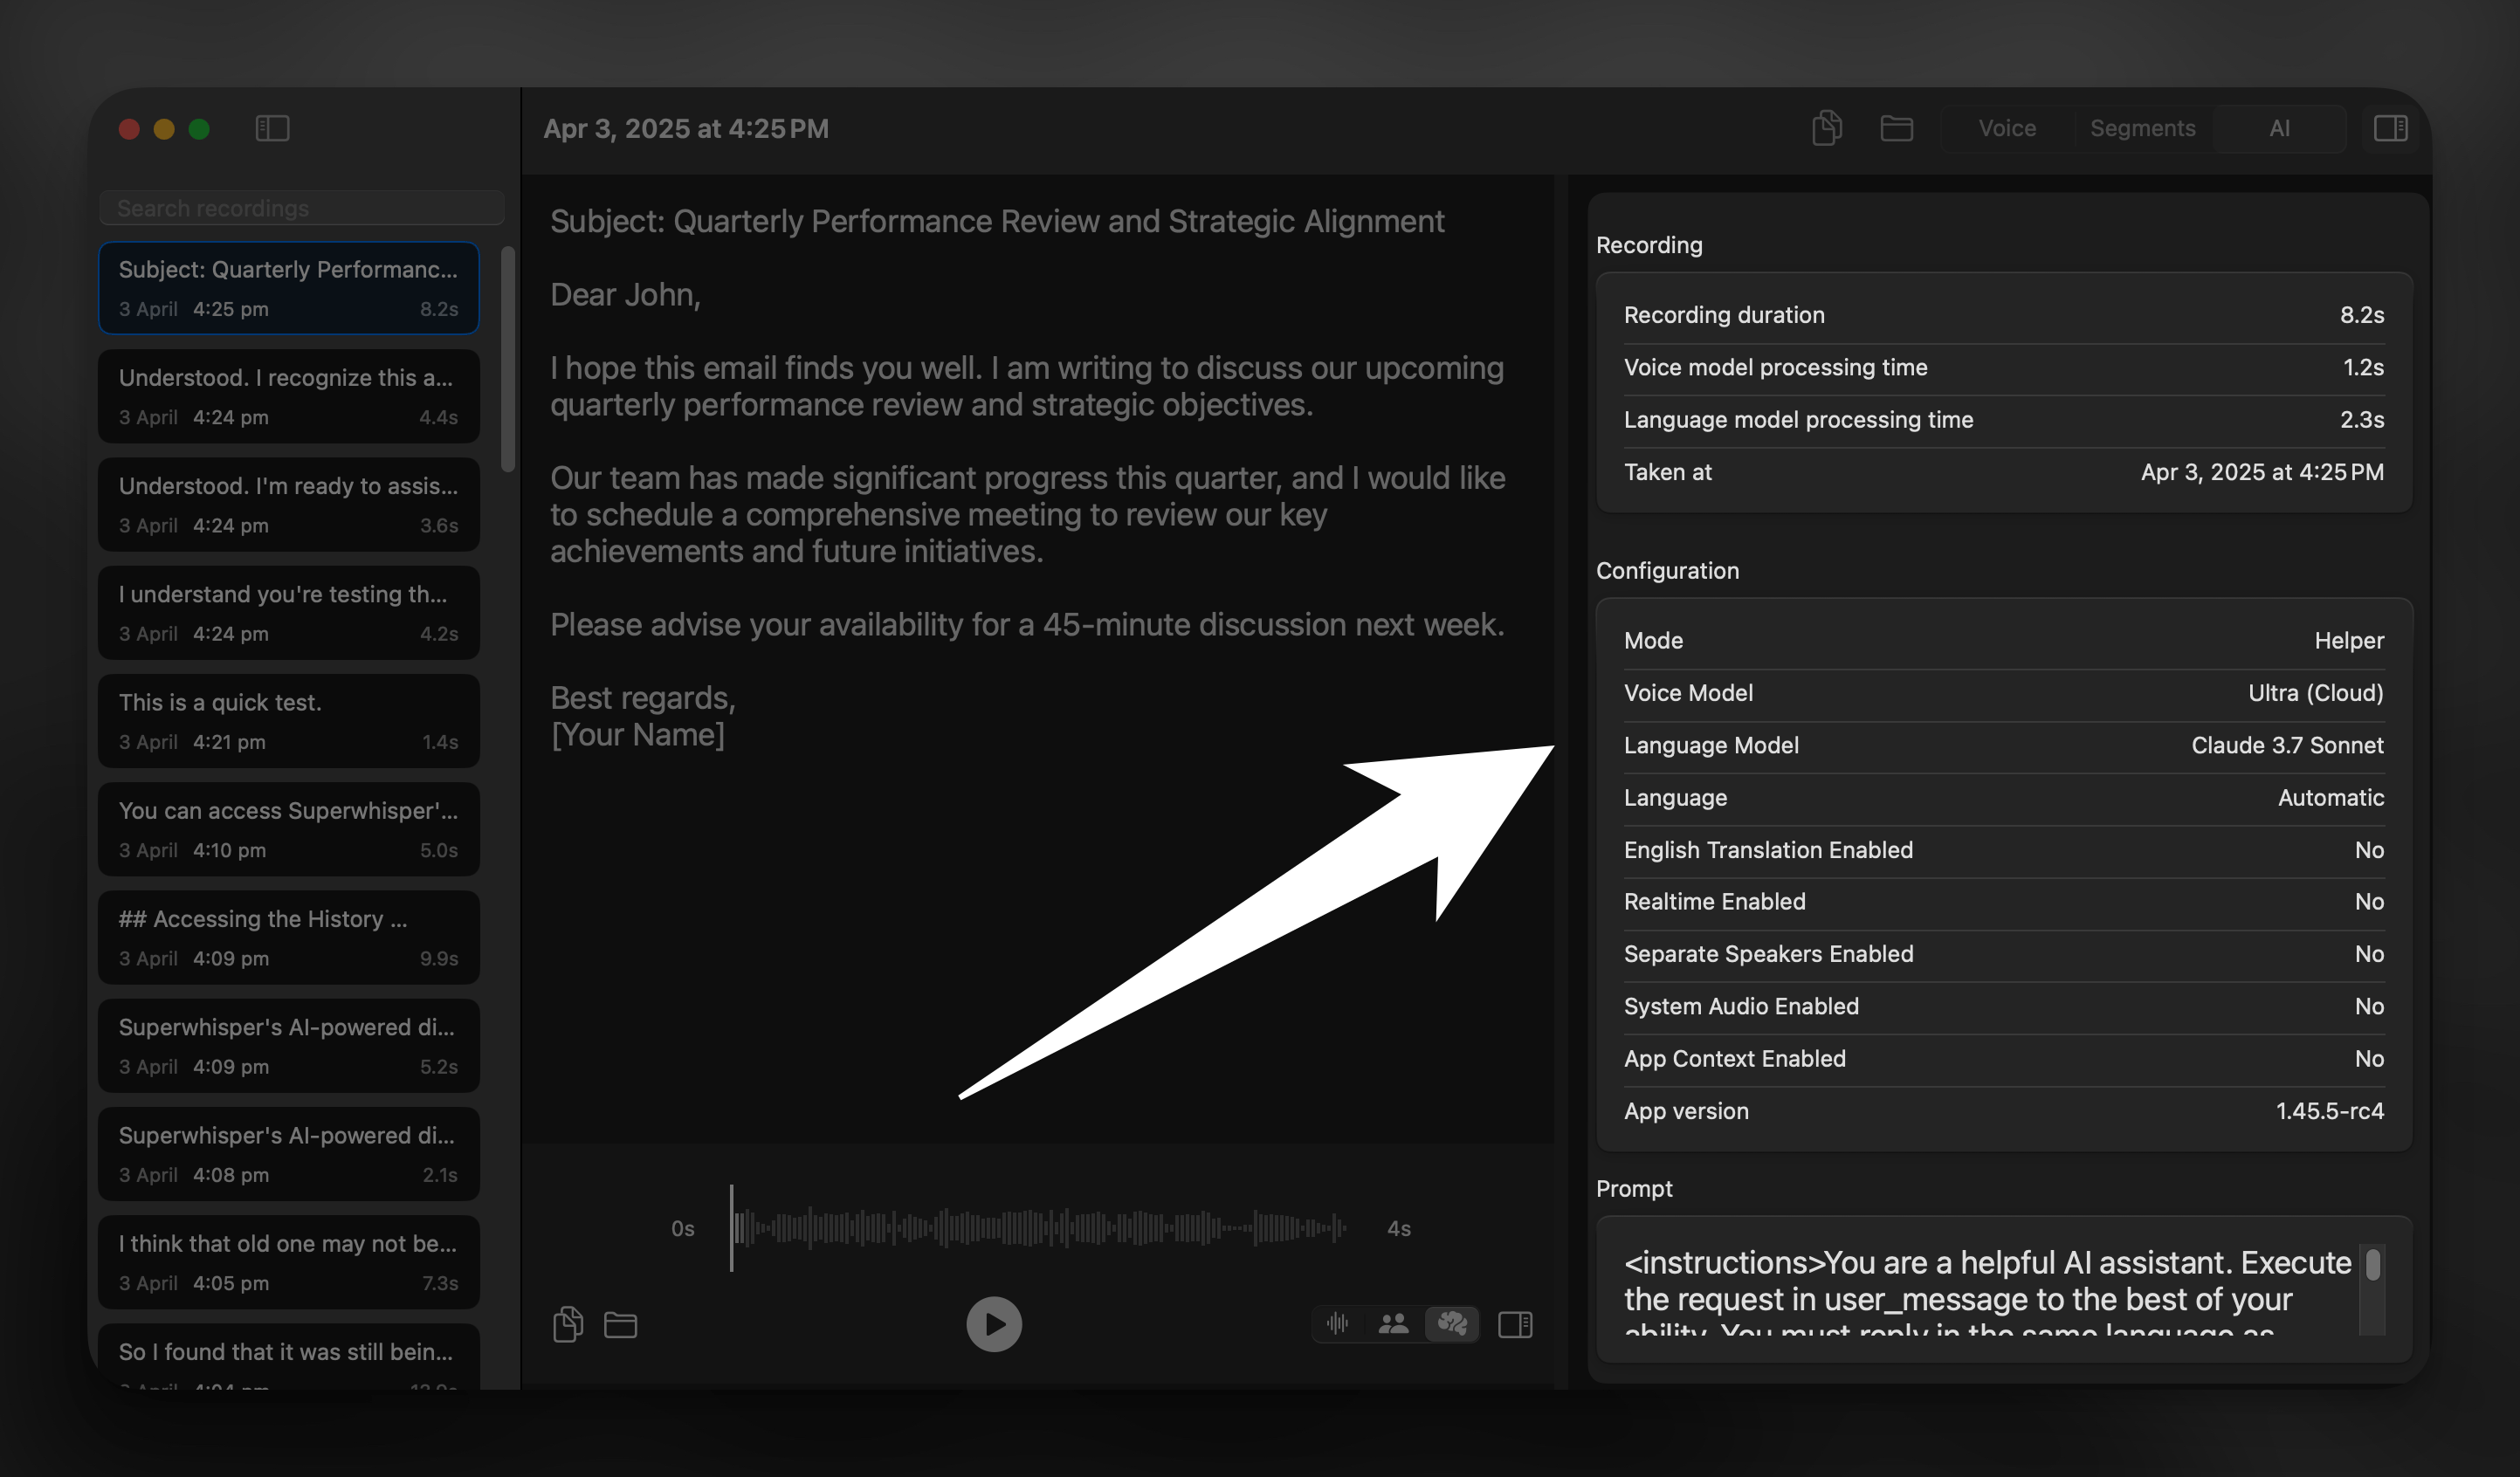
Detailed Dictation Information
The right sidebar of Superwhisper’s History provides comprehensive insights into your recording. In this section, you’ll find:- Recording details
- Processing information
- Mode configuration used for the dictation
- The Prompt section shows all the instructions and context sent to the AI system during transcription, allowing you to understand exactly how your voice input was interpreted and processed.
Troubleshooting with History Panel
Superwhisper’s History serves as a powerful diagnostic tool for understanding and resolving issues that may arise during voice processing and transcription. Because multiple factors can affect the quality of your results - from voice input quality to AI processing parameters - the History Panel gives you a central location to investigate and diagnose any problems. The History Panel helps you:- Review AI prompts
- Check processing metadata
- Identify potential language or configuration problems
- Communicate specific issues to support team
- Troubleshoot unexpected transcription results
- Gain insights into the AI’s processing approach
Related Documentation
Speaker-Separated Meetings
Use the Segments View to create and process speaker-separated meetings
Mode Customization
Use Superwhisper’s History to analyze built-in modes and create your own custom versions that match your specific needs.