Overview
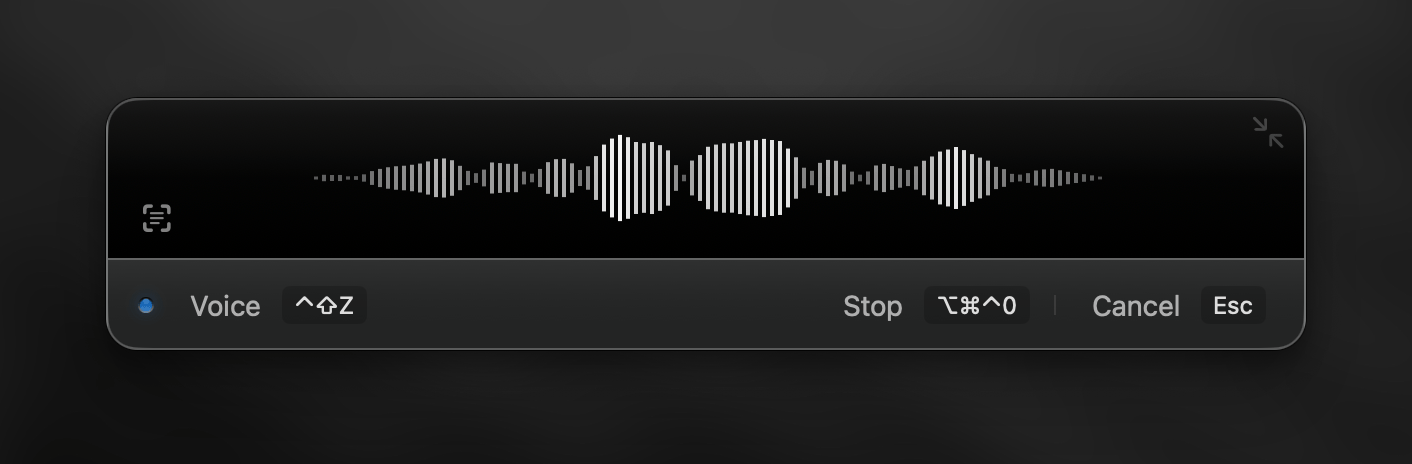
Superwhisper’s recording window is carefully designed to provide intuitive control and real-time feedback during your dictation. Let’s explore the key components of the main recording interface:Main Recording Window
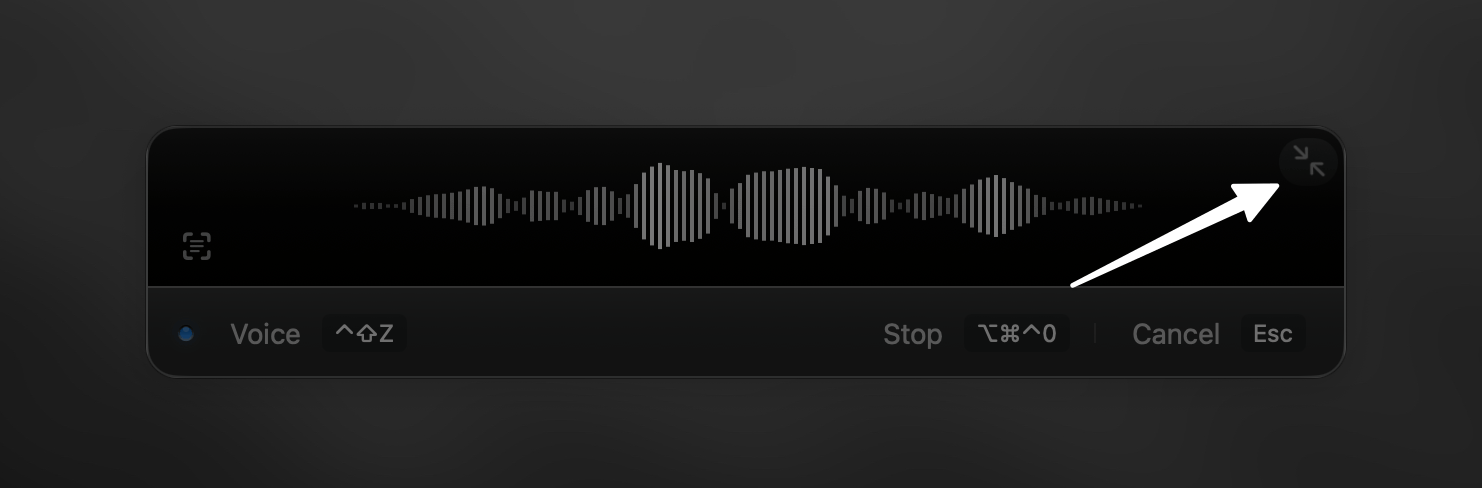
1. Resize Toggle
2. Audio Waveform
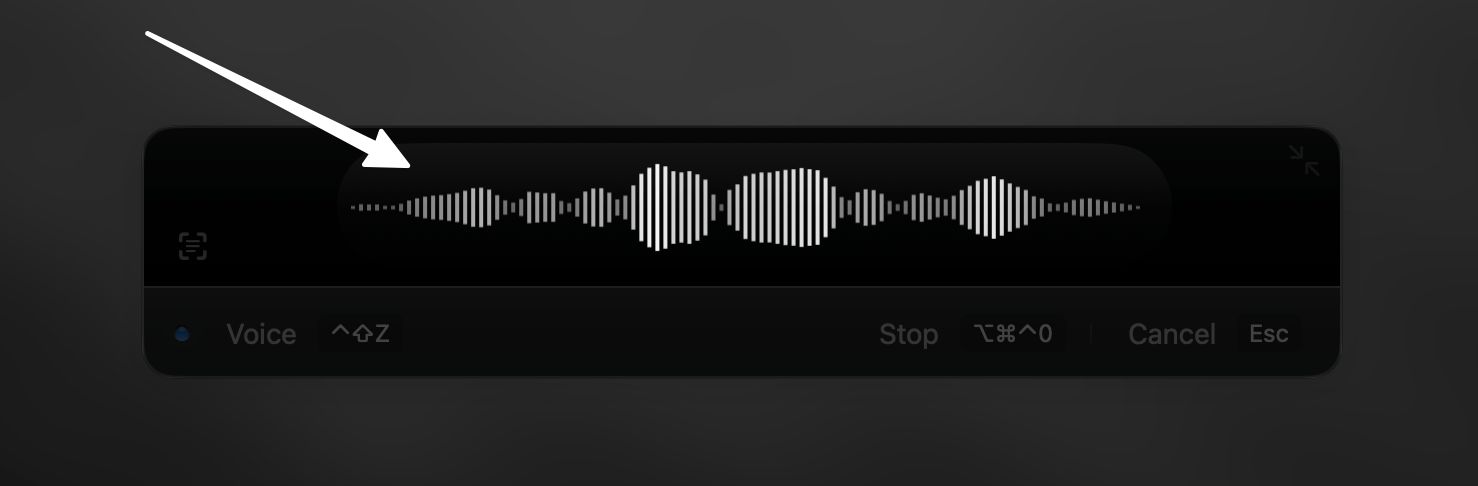
- Verify your selected audio input device in Superwhisper’s Sound tab
- Confirm microphone permissions in System Settings > Privacy & Security > Microphone
Exception: When using system audio capture in a Custom mode, the waveform remains static. Your audio still records properly - you can verify this in the History tab, which displays detailed information about each dictation session.
3. Status Indicator
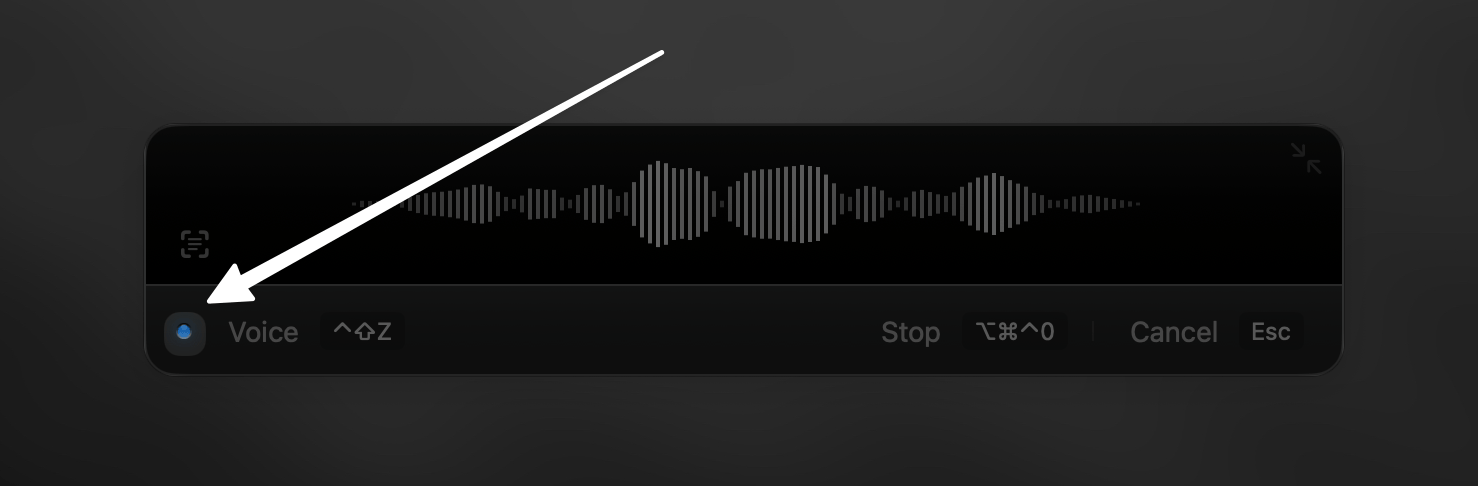
- Yellow: Model loading in progress
- Blue: Dictation processing
- Green: Processing completed
4. Mode Display
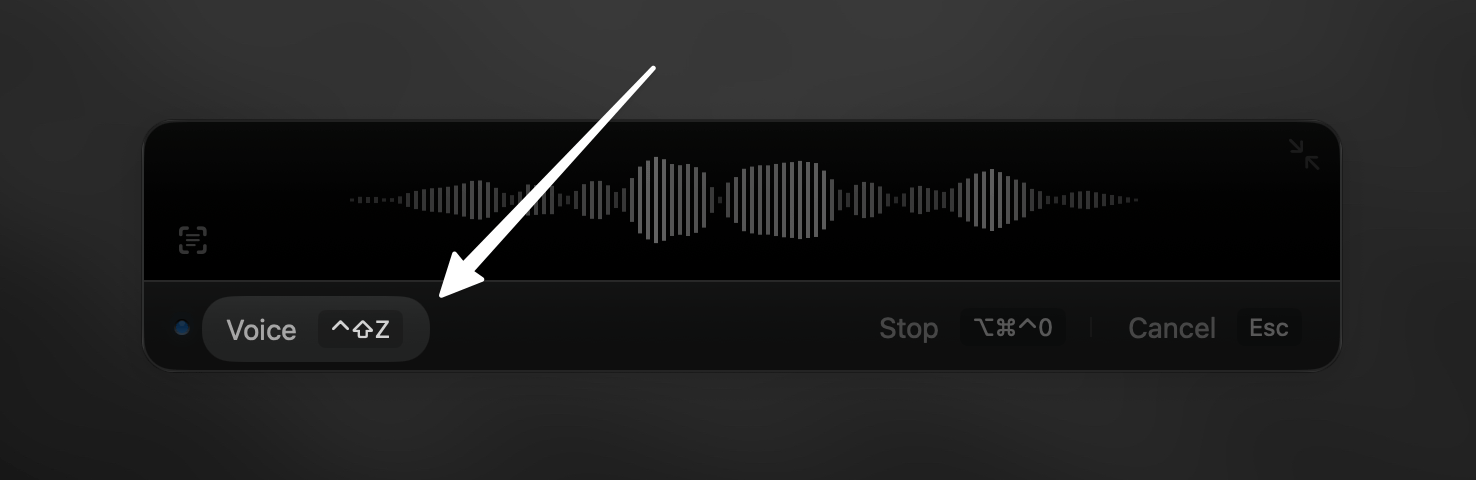
In Super Mode, this area displays your current application or website context.
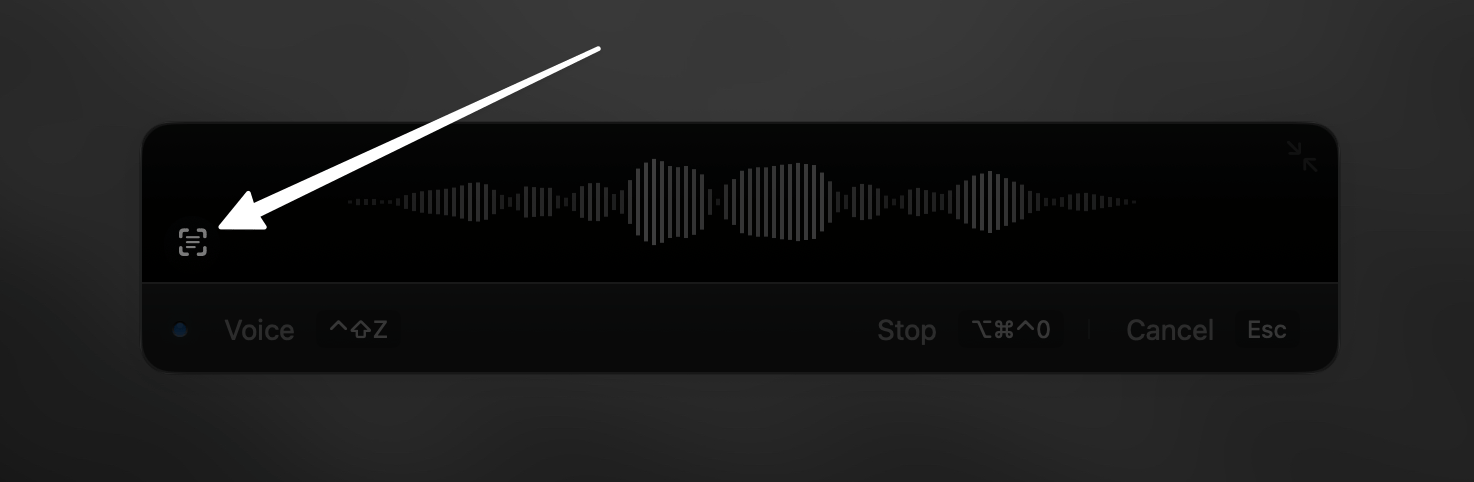
5. Context Capture
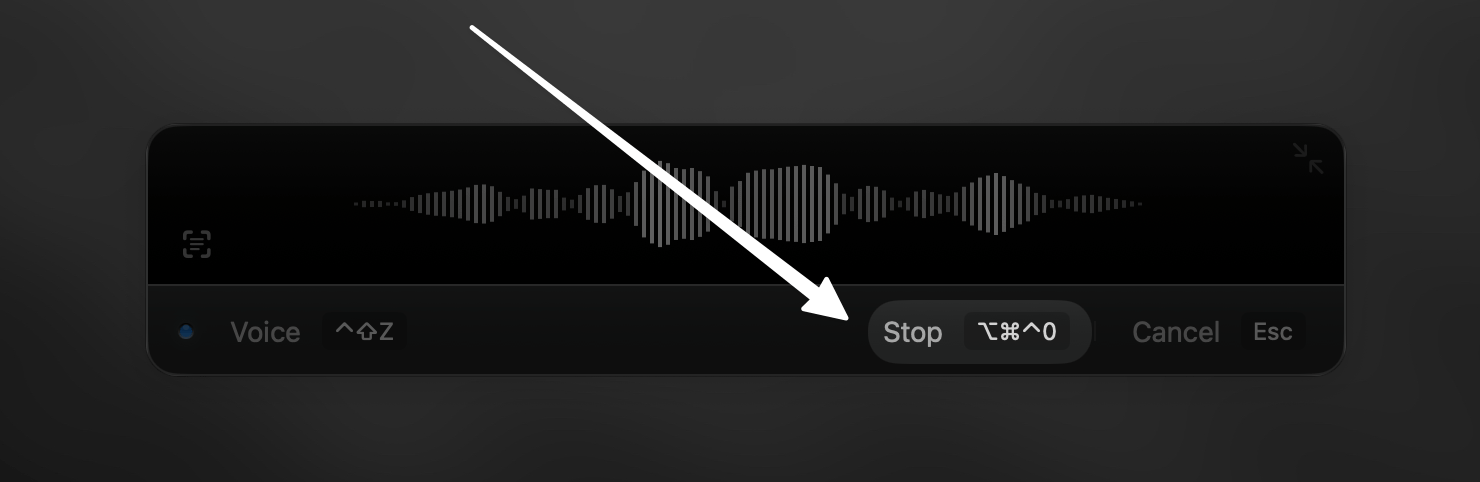
6. Stop Recording
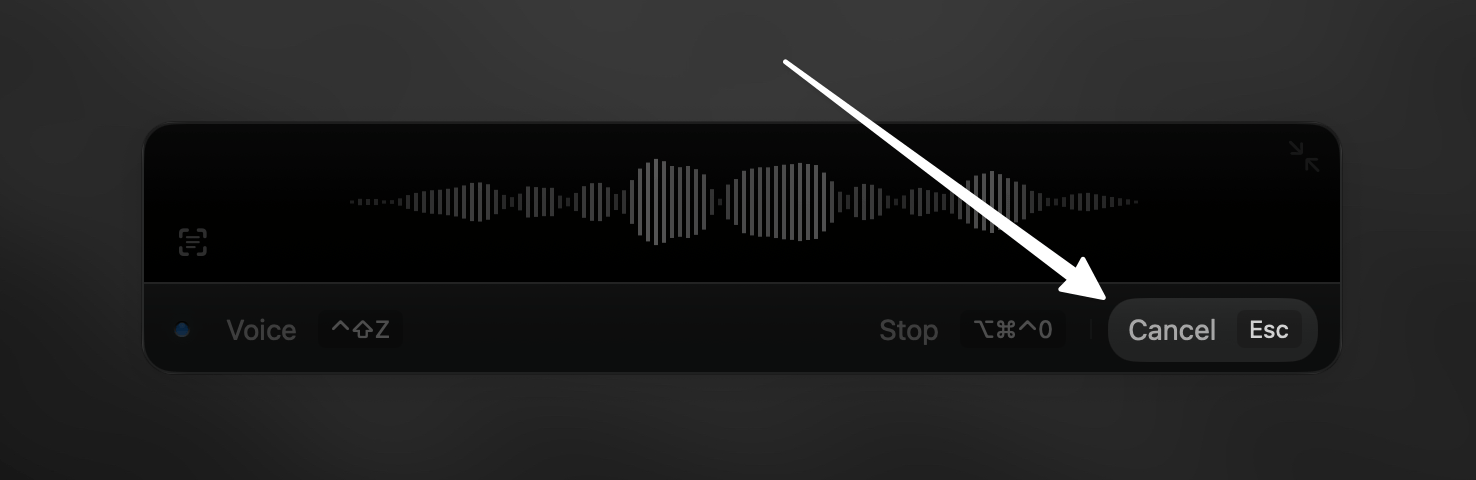
7. Cancel Dictation
Mini Recording Window
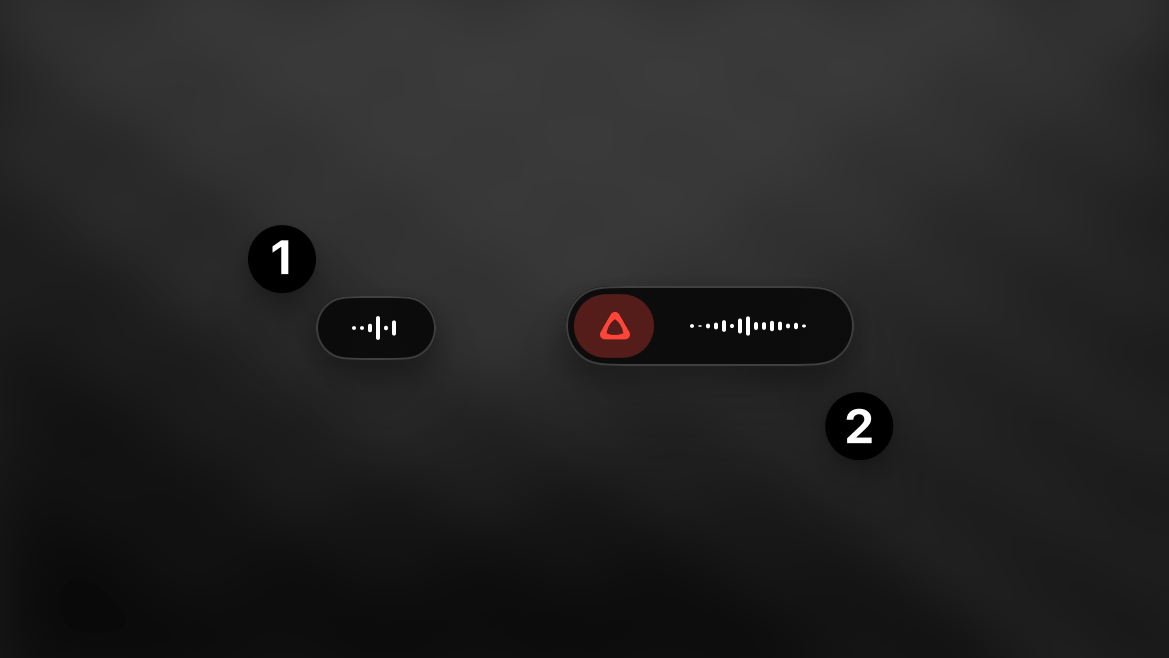
The mini recording window provides a compact yet feature-rich interface for controlling Superwhisper.Always-Active Mini Window
In Advanced Settings, you can configure the mini window to remain active even when idle. This creates a small visual indicator that’s always accessible.1
Hover Over the Indicator
When you hover over the mini window indicator, a control panel appears with three options: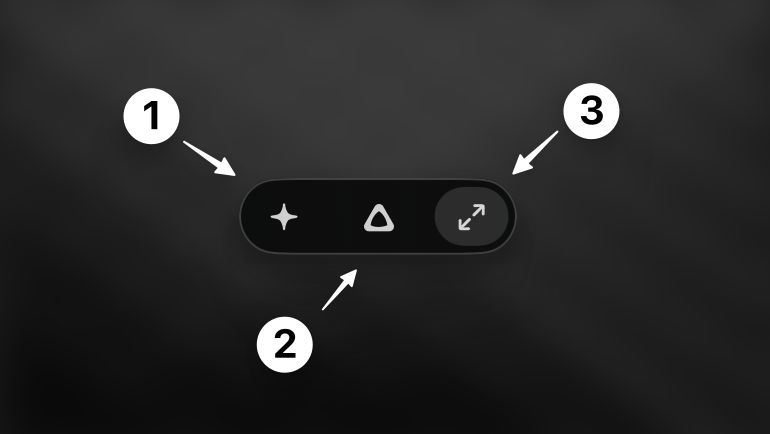
- Change Mode
- Start Recording
- Expand to Regular Window
2
Post-Request Controls
These same controls (Change Mode, Start Recording, Expand) also appear after a dictation request completes, particularly when results aren’t automatically pasted to the front application.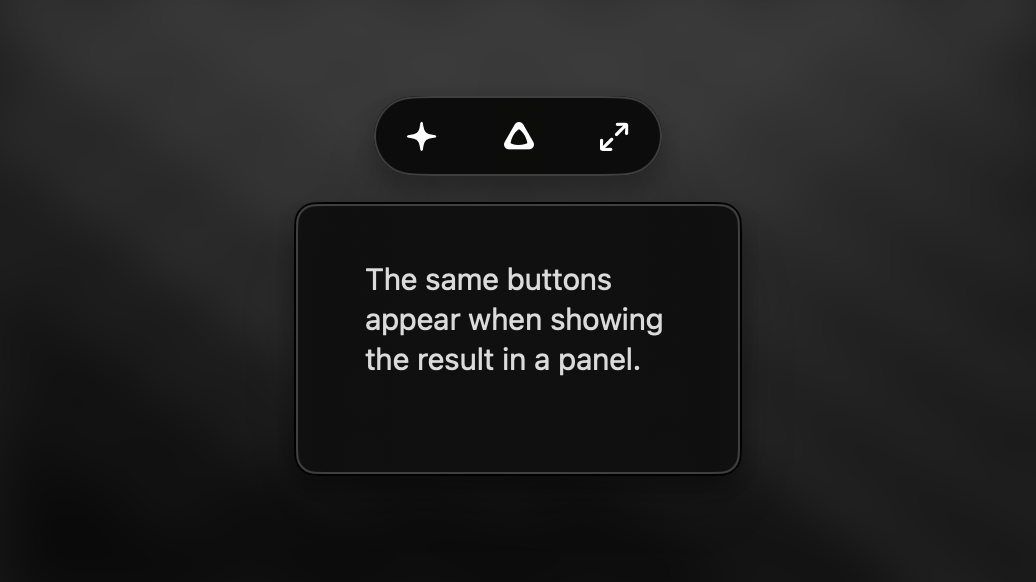
Recording with the Mini Window
You can start recording either by:- Clicking the recording button in the mini window
- Using your standard keyboard shortcut
Additional Mini Window Features
Related Documentation
Advanced Settings
Learn how to customize the mini window behavior and other Superwhisper settings.
Context Awareness
Discover how Superwhisper’s context awareness features superpower your dictation. These features help AI understand your needs and deliver smarter, more accurate results.