

Open settings
There are four ways to access the Superwhisper settings:- Click the Superwhisper icon in the menu bar (near the Wi-Fi icon) and choose Settings
- Right-click the mini recording window and choose Open Settings
- Press ⌘ , while the app is active (requires “Show in Dock” in advanced settings)
- Open the deep link
superwhisper://settingsfrom any launcher or automation
On Windows, click the Superwhisper icon in the system tray.
Keyboard shortcuts
Open Settings → Configuration.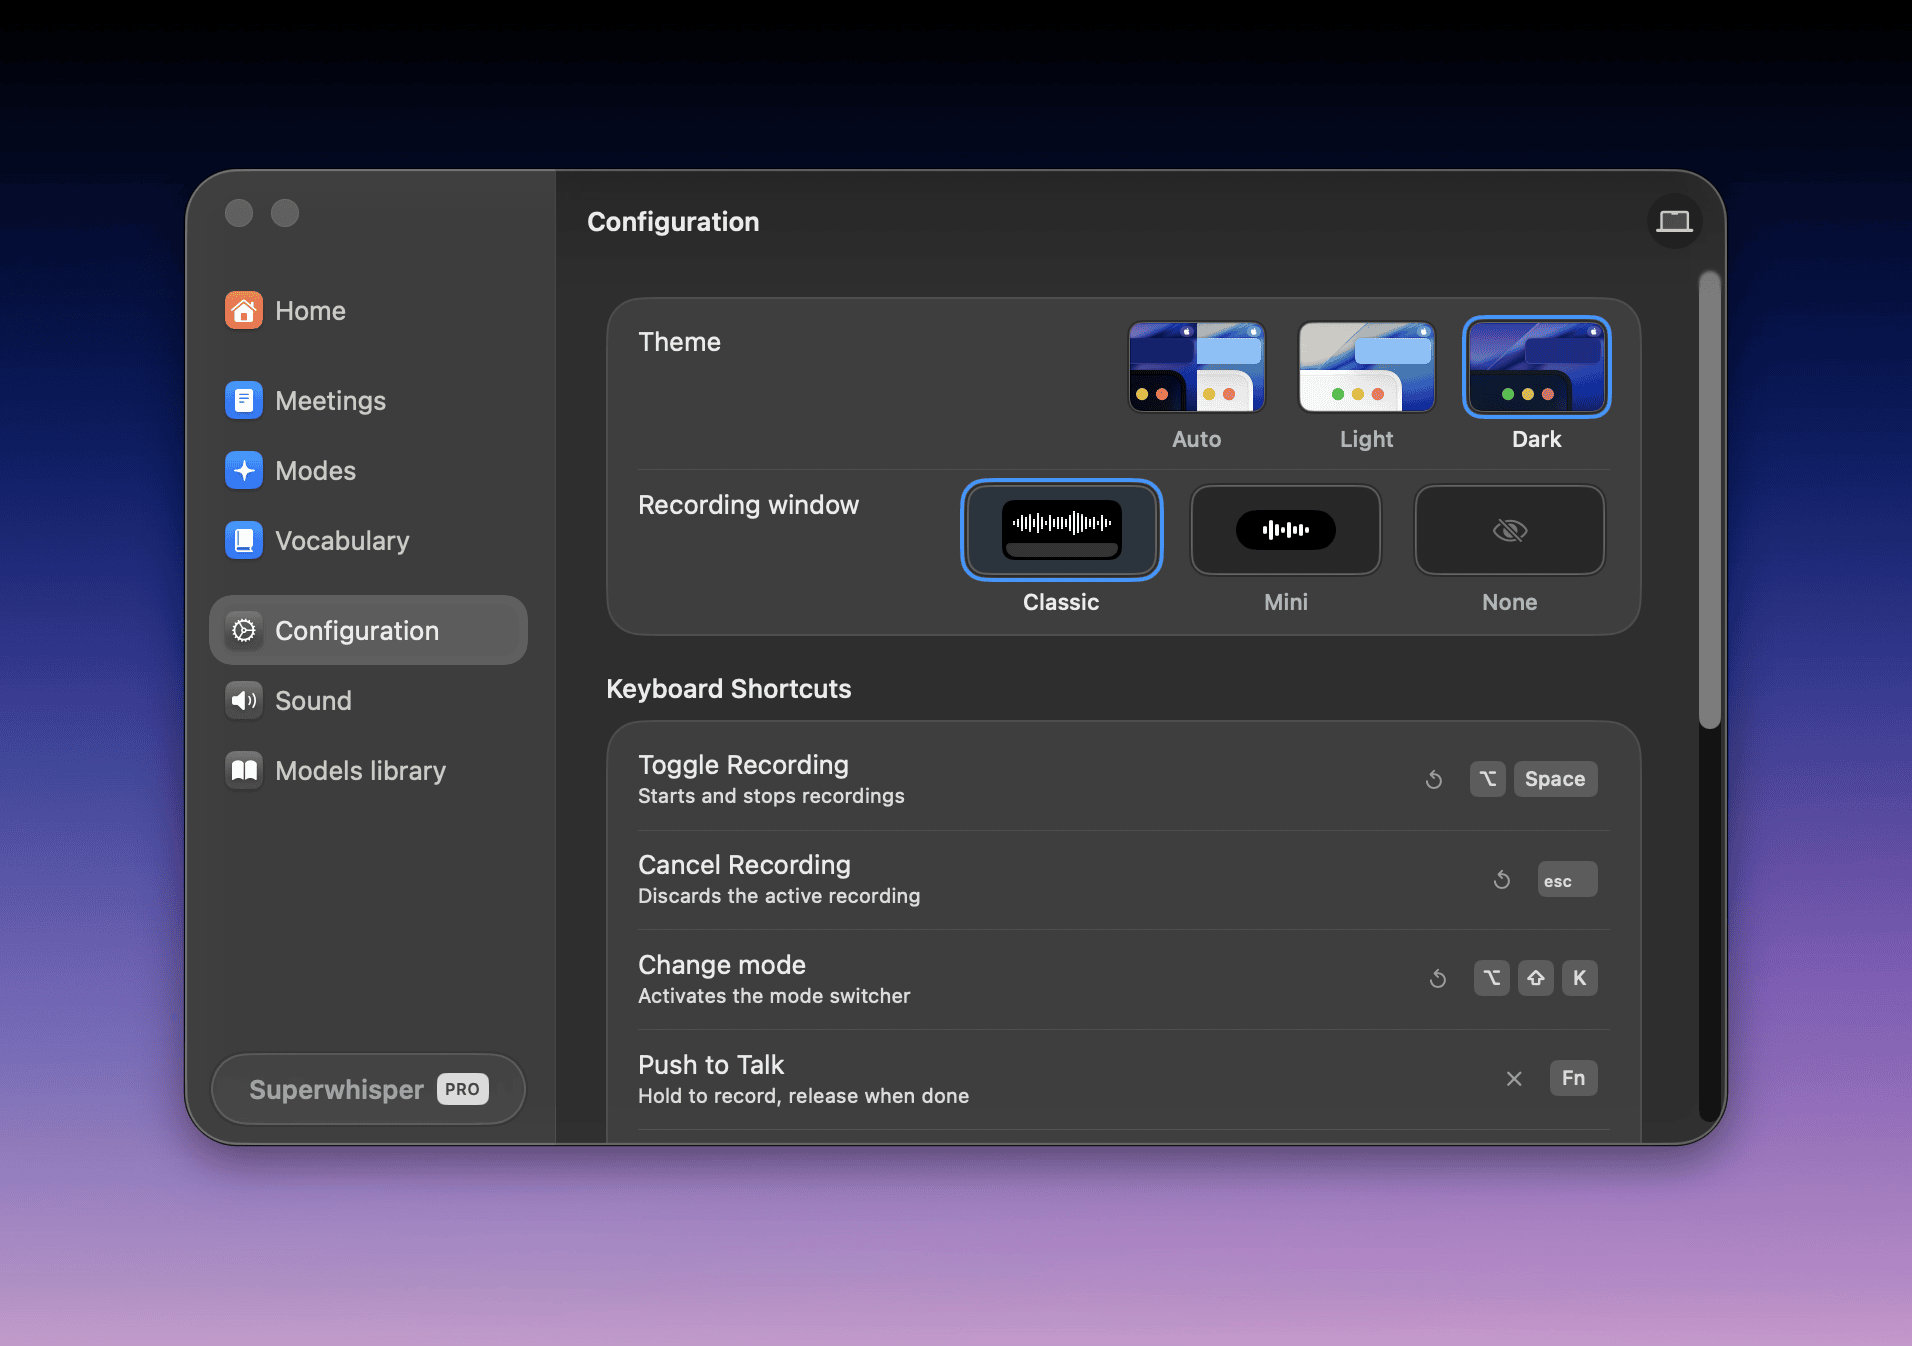
- Toggle Recording: Press to start/stop recording. The default is ⌥ Space.
- Push to Talk: Press-and-hold to record, release to stop. A quick tap acts as toggle.
- Cancel Recording: Cancels the recording without transcribing. Cancels immediately for short recordings; longer recordings ask for confirmation.
- Change mode: Press-and-hold to open the mode changer, then tap the key or use arrows to cycle through modes. Modes can be changed before or during a dictation. The default is ⌥ ⇧ K.
- Mouse shortcut: Assign a mouse button: quick click toggles, press-and-hold acts as push-to-talk. Note that some mice can’t detect sustained holds.
Application behavior
Scroll down in Configuration for update settings, launch on login, and error logging, which helps when you work with support. Keep recordings for is also here. It deletes older recordings automatically. See History.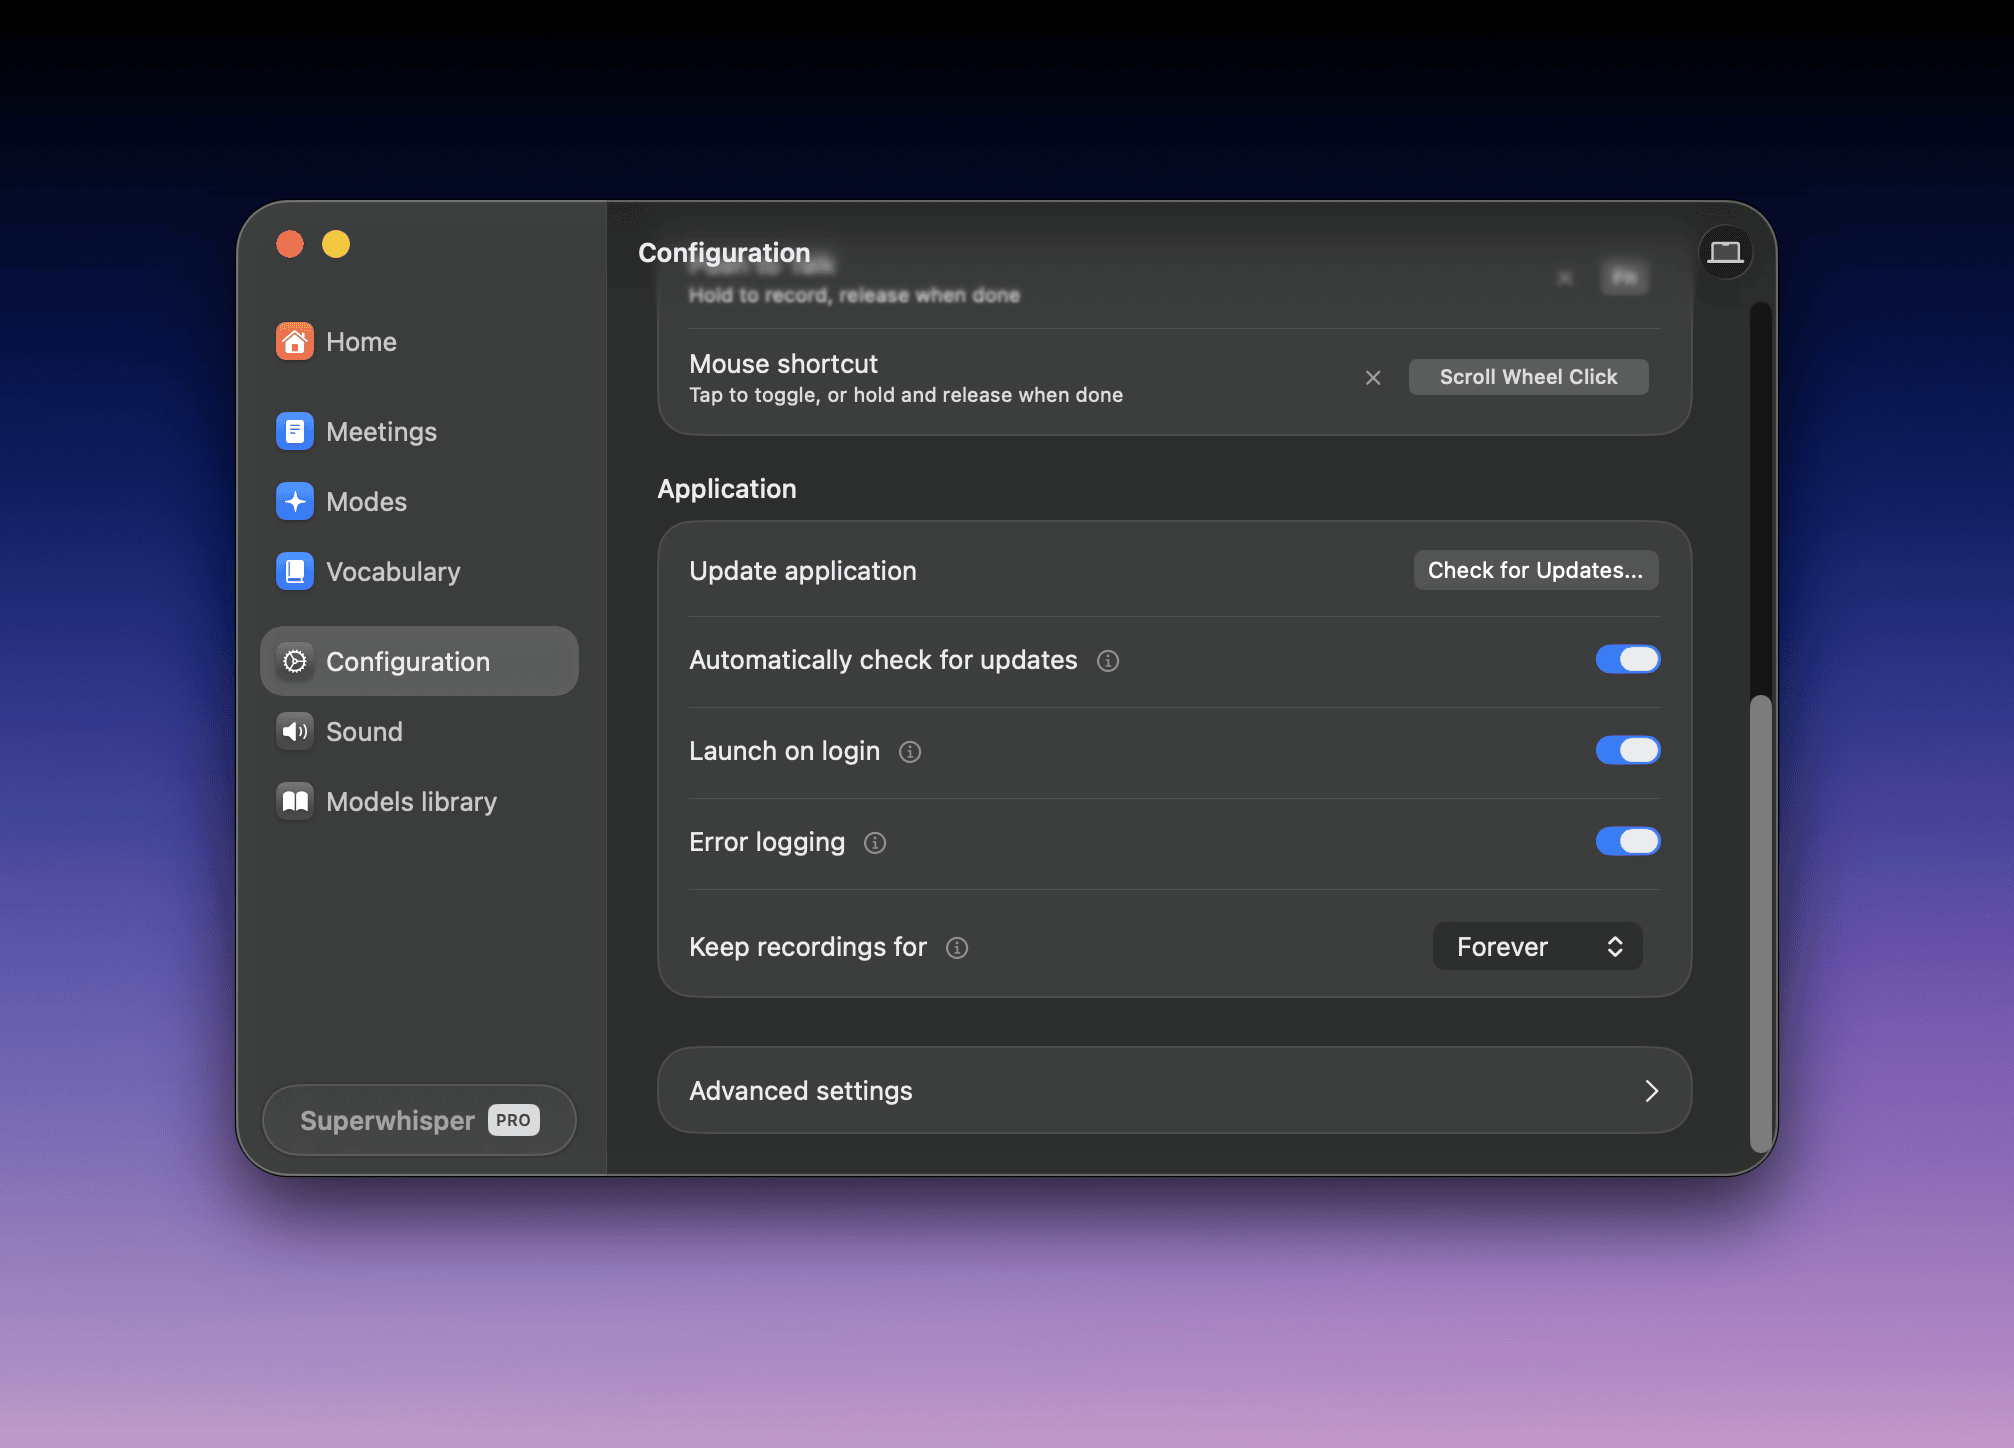
Sound and microphone
Open Settings → Sound.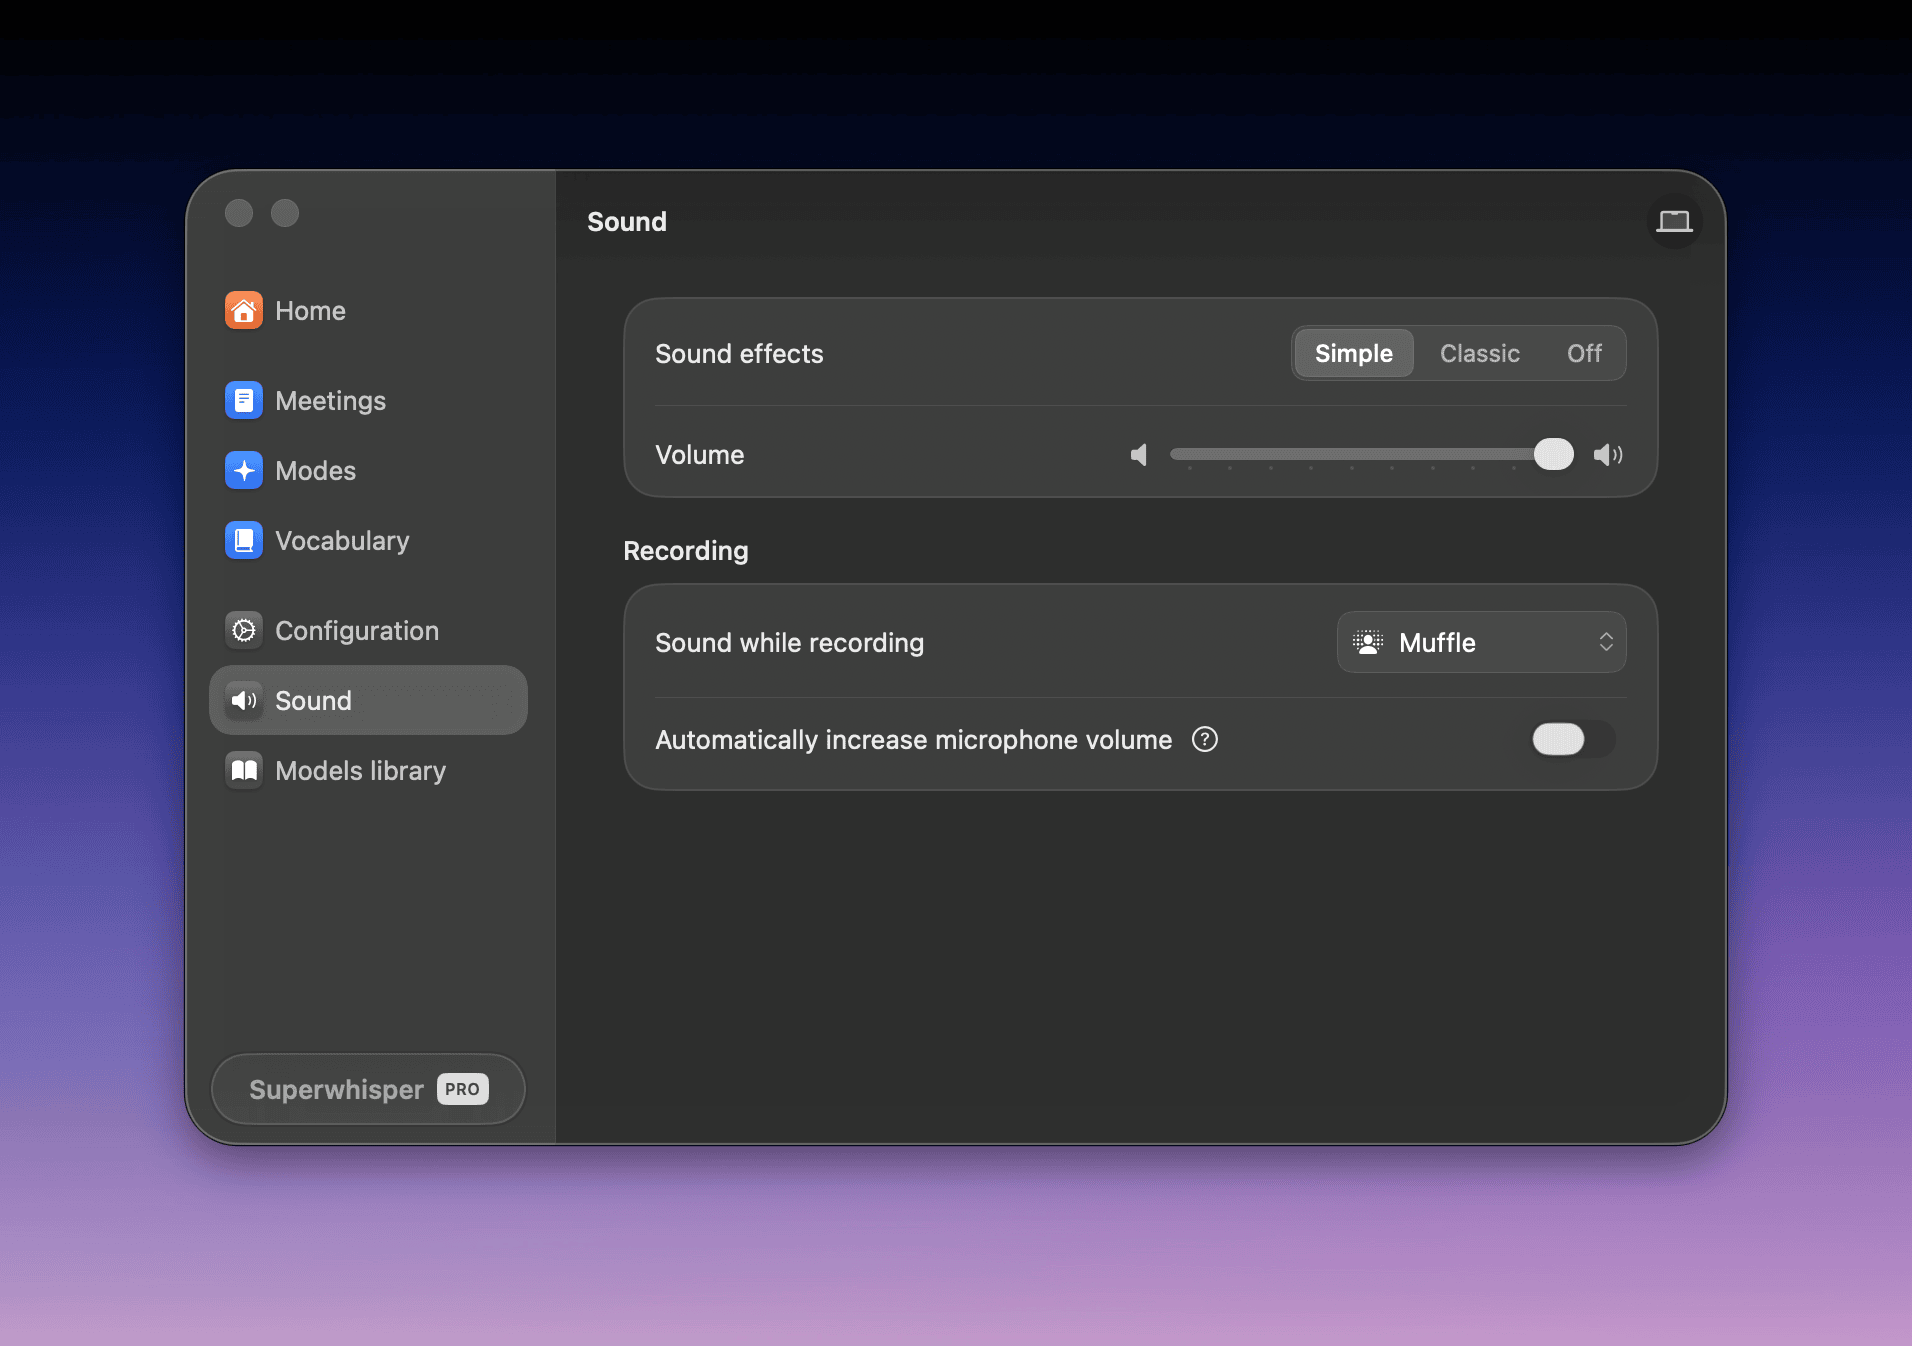
- Sound effects: the sounds that play when recording starts and stops. Choose Simple, Classic, or Off, and set their Volume. Click a speaker icon to preview a sound
- Sound while recording: what happens to your music and videos while you dictate. See below
- Automatically increase microphone volume: sets your microphone input to full volume when a recording starts. It works only when you use the system default device
Sound while recording
This is the default for every mode. It starts on Pause. To change it for one mode, set Sound while recording in that mode’s settings. See Modes.
Muffle needs macOS 14.2 or later and the System Audio Recording permission. If the permission is off, Superwhisper uses Lower and opens System Settings. Some audio apps, such as FineTune and SoundSource, need a one-click setup first. See Muffle troubleshooting.
More settings
Advanced settings
App folder location, FileSync, silence removal, clipboard content, and other power-user options.